Friday, November 23, 2012

Mul-tex Part 2: the Bag


I started with some acrylic paint and this nifty stencil Prochem sent me with my last order.  The Mul-tex is taped down because it has a nasty habit of curling on itself.

Here is the finished part of the black paint.  I used some extender medium to thin the paint and make it a little less opaque.  I'm painting on the shiny or laminate side of the mul-tex.


I let the black paint dry and then sponged red over it.  I used a primary magenta and quinacridone burnt orange paints thinned with fluid matte medium.  I wanted it to be kind of a wash over the black stencil, so I mixed it pretty thin.


After it dried (this is my kitchen table and DH didn't want any paint on it), I flipped it over and taped it down again -- it's still trying to curl.  I got out the gold and stenciled some cranes on the mulberry fiber side.

After it dried, I cut the mul-tex in half and layered each side with black batting and stitched all over.  I used red thread on one piece and black on the other.


I made it an odd shape because I thought it would look better that way.  I prefer the side that was stitched with the black thread.


And I lined it with a piece of red hand-dye.  I know the zipper is a little strange, but I didn't have a red one handy.

Monday, November 19, 2012

Messing Around with Mul-tex


I was given some Mul-tex in exchange for the creation of samples of things that could be done with this stuff.  Mul-tex is mulberry paper on one side and a shiny laminate on the other.  I made this art quilt and the little bag.  In the next two posts, I will outline the techniques I used to create each of these.

---Stay tuned...

Friday, November 16, 2012

Special Dye for Jack-in-the-Pulpit

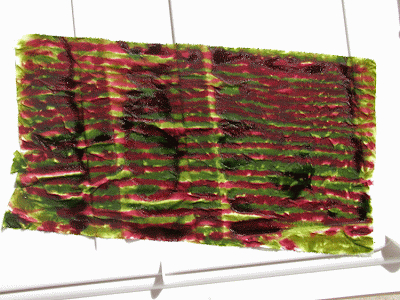
So my friend Alice was making a special  hand-appliqué quilt featuring Wisconsin wildflowers and she needed some "purple and green striped fabric" for her jack-in-the-pulpit block.  

"Anything you do will be just fine," she assured me as I went into extreme-dyer's mode and wanted to know how large to make the stripes, what shades of green and purple --olivey green? limey green?  grapey purple?     "I'm sure I will love anything you do," she calmly told me as she smiled her pixie smile.


I really like her and her work (she has been a most prolific quilter, only recently venturing into the art quilt realm -- about which I am extremely excited!) and I wanted this fabric to be special.  "I just need a little bit -- it's for a tiny part of the flower,"  she said.  Well, I can do that.  So I got out my stuff and decided that thickened dyes would be just the thing.  I had great fun painting them on the fabric using the little squirty thingies (pipettes) that I find so useful for all kinds of art projects.  I could hardly wait until the next class to see her and give her the fabric. 

And it took a while, but she came to the last class with this.  She said she started with a book, but some of the flowers were "incorrect."  So she had to change them.  


And here is a closeup showing the fabric I created in the center of the flower.


I am linking up with Nina Marie at Off the Wall Friday.