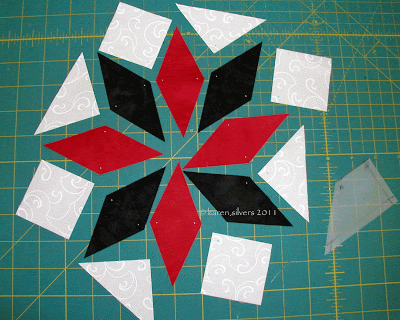
The Lemoyne star is an eight-pointed star with inset seams that forms the basis for many great stars. Lone Stars, Star of Bethlehem, and some feathered stars are based on this block. I have to admit, I love all stars, but this is my favorite of the traditional star blocks. I also love the challenge of fiddley piecing, but this is not that hard to do. Of course, it does take some accurate cutting and sewing skills.
There are some wonderful books out there -- my favorite authors are Marsha McCloskey and Jan Krentz. Both of these women have authored great books with step by step instructions and lovely inspiration. They also offer special rulers, but I make my stars with my trusty old 6 x 12 or inch ruler.
Unlike a lot of machine pieced stuff where you cut everything oversized, sew it together, then cut it down to make it accurate, I find that accurate cuts and then careful sewing works best for this. Because of the bias edges on the diamonds, it's easy to stretch them. Then the points get cut off when the block is squared up. Starch or sizing on the fabric and careful pinning and stitching eliminate this problem.
I use sizing instead of starch. I've never had a problem with any of the "beasties" that are attracted to starch, but my studio is in the basement and I don't want to chance it. I lightly spray slightly larger strips, then cut them down to size.
For this six inch Lemoyne star, you will need two strips, stiffened with starch or sizing, then cut down to one and three quarters inches (1 3/4").
Placing the ruler with the 45 degree mark on the edge of the strip, make the first cut. Then move the ruler until the one and three quarters (1 3/4") lines are along the cut edge and cut the diamond.
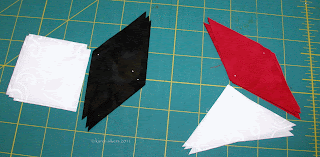
You will need eight diamonds for this. I stacked the red and black strips and made four cuts for my eight diamonds.
Cut four squares at two and one quarter inches (2 1/4") each and one square at three and three quarters inches (3 3/4") of stiffened background fabric.
The larger square is for the quarter square triangles. Set it on the cutting mat so that lines extend from each corner and without moving the fabric, make two cuts perpendicular to each other without moving the fabric.
Arrange all the pieces on the mat as they will be sewn together.
Mark the points of the diamonds (at the sides) and the points of each background piece where it meets the inner part of the diamonds.
I used my chalk pencil on the dark fabrics and a blue washout pen on the light fabrics (click on the photo to see the dots more clearly).
For marking, I use this tool I made from template plastic. It has holes at each of the spots where the quarter inch seam allowance meets. The important thing is to measure the angles and quarter inch seam allowance accurately.
I left the photo large, so by clicking on it, the measurements will be obvious. I would give credit to whomever thought this up; but I received it such a long time ago, I can't remember where it came from.
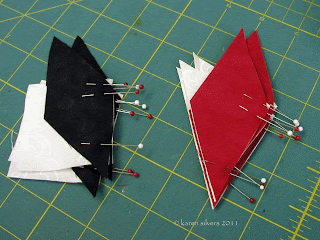
Arrange the pieces into piles. I like to sew the initial seam with the diamond on top because I don't want the feed dogs to stretch any of my diamond shapes.
The reason for arranging them into these piles is because it makes it much harder to get confused and accidentally sew the wrong diamond to the wrong background piece and wind up with this:
Then I pin all of the diamonds to their respective background pieces.
First I poke a pin through the dots and line up the edges. For the diamonds sewn to the triangle pieces, the narrow points should line up exactly.
I hold the pin straight up and down between my index and middle finger and carefully slip in a pin on each side of the first pin. Then I remove the first pin and poke it through the diamond/triangle point to hold that together while I stitch the seam.
I use silk pins that are very thin and strong.
After I have pinned all the diamonds to the background pieces, I take them to my machine to chain piece.
Next: Stitching and pressing the Lemoyne star.


2 comments:
Great so far.... I've only made one by hand... I just might have to make one with the maching... now.
Thank you SO very much for taking the time to post this. I've been searching the Internet for 3 days for a tutorial piecing the Lemoyne Star with the traditional y-seam, with measurements and tips on getting it right. The set in triangle sizes area pain for me. After reading this I know I can finally start my first LS quilt tomorrow. Thanking you bunches! Amie
Post a Comment