On this first Monday in August I thought I'd share a shot of three of the four hibiscus series that I've painted so far as they appeared on the design wall before I layered them in preparation for quilting.
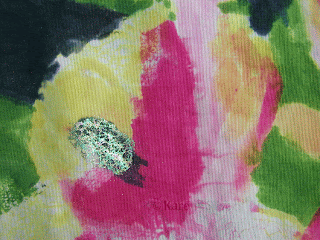
I used a little bit of foil and Misty-fuse to make the beetle sparkle on this resist/dye-painted hibiscus.
And a bit here on this dye-painted one too. I'll hit it with thread when I do the quilting.
I have nearly finished the quilting on the acrylic ink hibiscus. I was a little stumped about what to do in the background; but after I examined the original photo I realized that in the greenery of the background, there were lots of buds among the leaves. And hibiscus buds would be a lot of fun to quilt.
Then I had to decide what color and weight of thread to use. I used a variegated green 40 weight King Tut thread here. I'm still debating what color/weight to use in the black areas of the background. I can't rip out thread on this acrylic ink-painted piece because the holes will show (guess how I know that). So I have to get it right the first time.
No, you can't see the back yet...
Tomorrow I will post a tell-all about how I did the resist/dye-painted hibiscus on the left in the photo at the top.
Until then, there are design walls aplenty at Judy's blog (here).


6 comments:
Very nice, Karen. I really like the shading on that last closeup...makes the plant look 2D.
I know that they are not done... so I'll wait for the back(s). They are all looking good.
Lovely. I really like your bug! Sandi
How beautiful and I really like the way you quilted the background!
ohhh thanks so much for sharing your process - I love to see how others attack flowers! Lovely!
What a beautiful flower! I love how you quilted it.
Post a Comment