Showing posts with label Off the Wall Fridays. Show all posts

Friday, March 27, 2015

At the Pond


I started this rather traditional quilt last fall when I met with the Very Friendly Ladies in Monroe for our fall meeting.


It's adapted from this pattern.  When I saw the pattern, I thought "pond" and changed the colors accordingly.  Now that the top is finished, I have to decide what to top the top with.

At first, I thought a great blue heron would be a good idea.  But the colors would probably blend with the background.  So then I thought of a white egret.  They're a type of heron and the white feathers would really pop against my pieced pond.

So I started going through my egret pics from last fall and discovered approximately two thousand shots - give or take a hundred.

I'm playing with these two: 


I'm also partial to the fellow in the previous post here.

Linking up with Nina Marie Sayre today in Off the Wall Fridays.

Friday, March 13, 2015

A Row with a Windy Sky


I quilted the sky and now this is officially finished. I chose to do a windy sky because the buildings looked so calm and staid.  I thought it would be a nice contrast.

Linking up with Nina Marie Sayre this morning at Off the Wall Fridays.

Friday, August 23, 2013

Ocean Cruise - the Beginning


I met with the Very Friendly Ladies in Monroe, Wisconsin and our project was this very traditional tessellating block quilt.


I took some of my Caribbean-colored hand-dyes and a couple of different whites for my blocks.


But it was still too traditional looking for my taste, so I got out my dye thickener and mixed up some dyes for painting.


I thought a couple of dolphins would be good.


And a sea turtle -- he's pretty yellow, I know.  But I think it will be ok after it's all put together and quilted. Although I might do a little painting over his shell with a green or brown.

And a toucan to watch over it all.  I used some really old thickener that I had out in the garage and didn't mix it quite thick enough, so there's some running  of the color.  The tree and the big red bump on the beak were the worst parts.  --Of course, I found the giant economy size bag of new thickener while I was putting away the supplies for this.


This is what it looks like on my design wall.


I think it will look good after I get some more of the tessellating blocks finished.  And maybe a little border around each of the dye-painted parts.


I'm linking up with Nina Marie at Off The Wall Friday.

Friday, July 19, 2013

No Strings Attached Shibori - Part 1


Usually when I do shibori, I wrap the soda-soaked fabric around the PVC pole, wrap string around it, sometimes a rubber band at each end, scrunch it down, dip in or drizzle over with dye, batch, remove rubber bands, untie string, unwind string, unwrap fabric, rinse, wash, iron, and enjoy.  Phew.  I'm tired just writing about it.


But there has to be an easier way.  Right?  Since most of the work is in the prep, what if a couple of the steps were eliminated?  Like the string.  It's a hassle.  And, I've discovered, not really necessary.


I took my soda-soaked fabric, wrapped it around the pole, secured one end with a rubber band (I recycle the ones I get on broccoli and asparagus), scrunched, then secured the other end with another rubber band.

Then I rolled it in dye.  I mixed my dyes a little less strong than usual because I wanted to over-dye with a second round.


 I used two different black dyes to get this one -- love it just the way it is.

But this one which was wrapped around the pole with the widest diameter was not that interesting.

A perfect candidate for over-dyeing.  Along with the other two pieces I did.

Next:  the over-dye results.

I'm linking up with Nina Marie at Off the Wall Fridays.

Friday, July 12, 2013

Fueling the Magpie


I have this sparkly necklace that I really like.  But I haven't any earrings that I really like with it.

"You'll want something simple," the lady at the store said.  "So as not to compete with the necklace," she continued.

And the polite person my mother raised smiled and nodded and said nothing.

While the magpie inside shrieked, "ARE YOU KIDDING ME?!!!"


So I dug my jewelry-making tools out of the mothballs, along with some sparkly stuff from my stash, and created these beauties to vie with the necklace.


Since I had all that stuff out, it was determined that I may as well make more than one pair.

These are for DD -- they include: the sun and the moon, which shine upon her; a star, which she is; and a heart because she has mine.  And a couple of crystals to satisfy the magpie.


And a pair for me -- in my favorite colors (some of them, anyway.)

OK -- back to fiber.  I have some things that are nearly finished -- I'll get photos up here soon!

I'm linking up with Nina Marie at Off the Wall Fridays.

Friday, June 28, 2013

One Stitch Forward, Two Stitches Back


So I was merrily stitching along on Tulips and Rose and I realized that I had done a terrible thing.

I finished a large section of Rosie's fur with the same stitching that I used for the tulips.

Aaarrrrrrgggggghhhhh!  It was particularly noticeable when compared with the correct Rosie's fur stitching.  I did take a moment and think, "well.... I could just leave it.  No one but me will know what it was supposed to look like."  But I couldn't.

Even DH, who entered my lair as I was grousing and mumbling profanities, agreed.  "You can't leave it," he said.   "It will bother you forever," he added helpfully .  AAARRRGGGHH!!

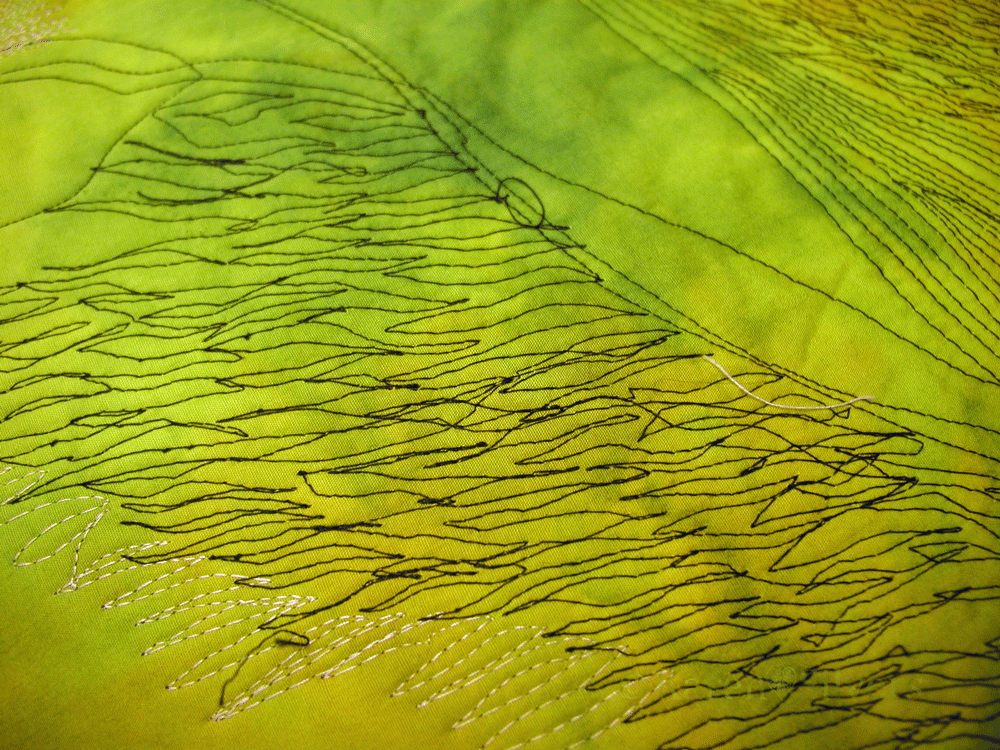
Of course, black thread on black fabric is a teensy bit difficult to see.  And as anyone who has ever ripped out quilting stitches knows, thin thread is especially awful to remove.


So that evening, was I comfortably ensconced on the couch watching TV?  Sitting on my can reading my book?  Happily doing anything?  No!  I was bent over the ironing board with a seam ripper, tiny scissors, and a pair of tweezers picking out stitches.  I discovered that the ironing board was a pretty good place to do this because, first of all, the light is good in my studio.  Second, it provides a firm surface and I could flip the quilt back and forth to snip and rip.  And third, it provides something against which to lean my tired self.


I'm pretty sure I heard the studio gecko snickering...


I used the dog hair remover roller thingy to gather up all the loose thread (sadly, it was not useful for threads that were not already loose).


 I estimate that I probably spent twice as long reverse stitching as I did stitching it twice.  Was it worth it?  Absolutely.


Yeah, I know that it's hard to see the difference.  But guess how much fun it was to try to remove all those threads.


So now I'm a little stuck on the eyes.  I'm not sure how to do the thread.  Usually, when I paint them, I don't use any thread on them.  But I'm thinking that the appliqué needs some thread to anchor it.  Does anyone have any suggestions?

I'm linking up today with Nina Marie at Off the Wall Fridays.

Friday, March 15, 2013

Gone to the Dogz


I need some dogs for something I'm working on.  I took a photo of Rosie and inked it onto some cotton fabric with fabric Sharpies and Tsukineko inks -- sorry -- I didn't take a picture.  I layered the inked image with wool batting and used Decor-Bond on the back to make it stable, then I stitched all over it with my machine.  I did iron the sandwich to make it flat before I stitched -- and I had to hit it again with the iron to flatten it after the stitching.


I drew up some Jack Russell Terriers to keep Rosie company and did the same layering thing with batt and stabilizer.  I found some great variegated greys among my stash of Aurifil threads -- those would be the two grey ones on the right side of the photo.  These are all 50w spools.

Then I covered the little terriers with thread.

I am linking up with Nina-Marie at Off the Wall Fridays.

Friday, February 15, 2013

Turned-Edge Appliqué for the Faint of Heart


Last week I was encouraged to 'splain my technique for turned-edge appliqué.   I know there are others who do something similar to this, but this is the method I have worked out -- it's fairly quick, it's easy, and I enjoy doing it.

And best of all -- I love the results.


First I made a pattern from my drawing.  I reversed it in my computer and printed it full size.  I traced it onto freezer paper with a Sharpie, keeping the various elements together -- face, teeth, spikes, etc.  I keep a key with all the individual pieces numbered in colored pencil or marker; when there are lots of little pieces, it's easy to confuse them.  Hmmmm.... is that a tooth?  ...or a spike?  ...maybe a finger...?


I gathered my tools -- two pairs of scissors, one for fabric and one for paper, the magic pen, and some water-soluble glue.  The glue and pen are available at my LQS.   The paper scissors I stole from my kid.

Then  I start cutting.  I have learned to cut only a few bits at a time -- partly because of the confusion factor, but mostly because I find myself making changes as I build the image in fabric.


I iron the pieces to the wrong side of the fabric -- remember, the freezer paper was traced from a reverse image.


Then I get out the magic pen and "mark" along the edges that I'm going to turn.  I use a hot iron to turn the edges.  The magic pen wets the fabric and makes it easy to get really sharp edges.  I clip the inside curves so they lie flat and I cut out the bulk in the outside curves to make it easier when I quilt.

As I trace the pattern onto the freezer paper, I  look at the individual pieces to see which I want on top and which would look best underneath.  I use dots to mark the underneath seam allowances so I don't accidentally turn them under.


I dip a pin in the glue (it comes with a really nifty cap that squirts tiny dots, but it's not so nifty when it clogs and I have to spend time unclogging it, so I just use the pin) and wipe tiny amounts onto the seam allowance.  Then I literally glue the image together.


I use the cut out portion of the freezer paper as a guide to make sure that the pieces are glued together at the proper angles.

Sometimes I use tracing paper to trace an image that I can reverse to make sure that all my pieces are fitting together the way I originally drew them.

Using the reverse image and ironing the freezer paper to the wrong side allows me to see exactly what parts of the fabric I'm using and I can make changes if I desire.

I use the full size pattern to build the image with glue as I go.  I have learned to be careful to avoid getting glue on the freezer paper, and I remove it as soon as the pieces are in place.


Of course, all this begs the question: why bother?  Some say it makes the quilt more durable -- but this is meant to hang on a wall, so durability isn't really an issue.  Especially since I like to cover the whole thing with thread.   I am an art quilter and I have no qualms about slapping down some fused fabric and calling it a day. And I'm certainly not judgmental about others who fuse -- except when they don't use really sharp scissors to cut their fusibles and there are little tiny threads sticking out everywhere.  But that's another issue.

I am putting this dragon on top of a pieced background and I have found that sometimes fusing on top of piecing leaves lumps and bumps where I don't want lumps and bumps.  Also, I do this because I like the dimension I get with layering fabric.  It seems that the finished piece is more 3D.  I will be quilting this in layers for even more depth.  And it's way quicker than needle-turn appliqué.

I'm linking up again this week with Nina Marie at Off the Wall Fridays.

Friday, February 8, 2013

Celebrating a New Beginning


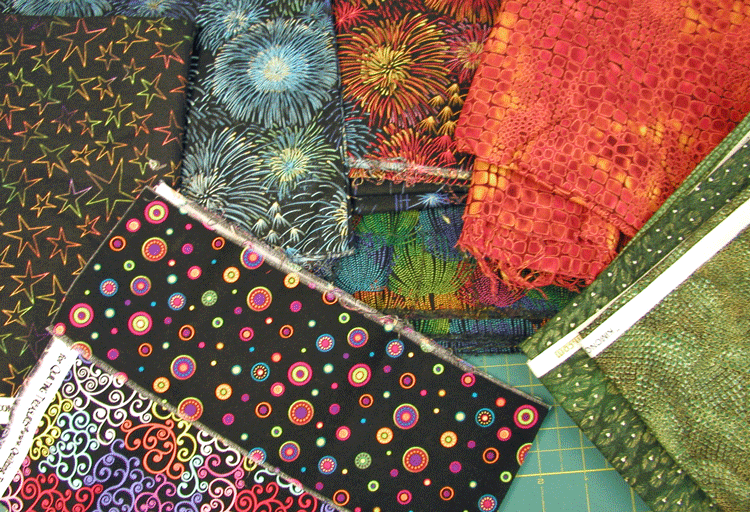
 I'm working on a challenge that is due next month.  I have to use these two fabrics and the theme is "celebration."


The first thing I thought of was fourth of July -- Independence Day.  The fabrics at the top left illustrate that theme.  But then I thought, hmmmm...that's a little vague.  So I brainstormed another idea.  


I took a whole day and made a pattern from freezer paper.


And pulled some hand-dyes from the shelf to go with the sparkly fabrics.

I'm doing a form of appliqué that I will explain in a future post.  It involves the aforementioned  freezer paper, a magic pen, an iron, and some glue.  And thread.  Lots of thread.

Later, there will also be some paint and some machine piecing.  I'm going for the full range of techniques here.

I'm linking up with Nina Marie at Off the Wall Fridays.


Sunday, February 3, 2013

Snow Dyeing with a Twist

Over at the ...Fire Blog this month, TieDye Judy has a post about scrunch dyeing (here).  I decided to take advantage of our wonderful snow (and the freezing temperatures that make it wonderful) and do some scrunch dyeing.  But wait!  There's more!

Of course, I have to add my own twist -- this time in the form of folded shibori dyeing called itajime.  

A lot of people who do snow-dyeing have fancy racks with screens set up so that the snow and dye can drip through the fabric.  I usually just put the snow on top and let the fabric sit in the soup of melted snow and dye while it batches in the up-cycled plastic lettuce boxes I like to use for dyeing.


But I hate wasting dye and I thought: what if I used fabric as a rack for the scrunched fabric?  I figured I would get pastel coordinating fabrics with interesting patterns to go with my snow-dyes.  So I folded up some soda-soaked fabrics and laid them in the bottom of the boxes and scrunched up more to sit on top.


I packed on a layer of the powdery snow and poured my dye concentrate over.  Then came the hard part...letting them batch overnight.

I put the boxes in a really big plastic box and left them in the front hallway overnight.

I prefer to use pure colors for most of my dyeing because I like to mix the colors myself.  But for snow-dyeing, I purchased a couple of already mixed colors -- a couple of browns and some blues -- because I never know just what is going to come out in the wash.


Of course I got fabulously patterned snow-dyes.  


But the real surprise was underneath.  No pale coordinates here.  I got these amazing bits.   I may add some of these to the to-be-overdyed-later pile because they might benefit from some more color, but maybe not.

I am linking up with Nina Marie at Off the Wall Fridays.