Showing posts with label machine quilting. Show all posts

Friday, March 13, 2015

A Row with a Windy Sky


I quilted the sky and now this is officially finished. I chose to do a windy sky because the buildings looked so calm and staid.  I thought it would be a nice contrast.

Linking up with Nina Marie Sayre this morning at Off the Wall Fridays.

Wednesday, July 30, 2014

"Not Quite as the Crow Flies"


"Not Quite as the Crow Flies"

16.5" by 11.5"

Created for the Reduce, Reuse, Recycle Challenge at Art Quilts Around the World.

I usually dislike these kind of challenges.  I tend to save and recycle everything anyway, so it wasn't necessary for me to have a specific challenge to do that.  

However.  When this was announced, I had previously made arrangements to gift another artist a couple of bags of the tiny scraps from my little hand-sewing project.  Mainly because I recently drastically downsized my living arrangements;  I just can't keep everything anymore.  Fortunately, I still had the baggies full of tiny scraps and used them for the leaves on my tree.  

The crow was drawn on a leftover scrap of fabric from my scrap fused fabric bin.  I used fabric, paint, and beads from my stash for the rest.  I did have to purchase a new spool of black thread, but that was because the one I was using disappeared and I would have needed another one anyway.  

This piece reflects my main impetus for recycling -- to save our environment for the wild things.  I took a winding path to get here, hence: the title.  


Wednesday, June 4, 2014

Bollywood Challenge at Art Quilts Around the World


"Jazz Hands!  Bollywood Style"
11.5" by 16.5"

This is my finished piece for the Art Quilts Around the World Bollywood challenge.  I pieced the background with sparkly red fabrics from my stash, then machine appliquéd the hands.  I used a double layer of the sparkly gold fabric to make it show up well against the red background.  

I had planned on doing some work on the hands that would suggest henna designs, but I couldn't find a medium that would work on the gold fabric.  Paint didn't sit on top nicely (my original plan), machine thread didn't work at all, and hand embroidery didn't look right.  So for now, it's finished.  

Wednesday, July 31, 2013

Opposites Attract?

Today is reveal day at Art Quilts Around the World.  The theme for this challenge was "opposites attract."


I admit, I had trouble with this one.  After discarding about a thousand ideas, I realized that I kept coming back to colors; I love that colors opposite each other on the color wheel are so pleasing together.  


So I finally just picked a couple and offset them with the black and white.  I used three or four different fabrics for each color -- the hand-dyes are all my own.  

I thought it looked a bit like an abstract feather, so I quilted it with somewhat traditional feathers, using bright, non-traditional thread.  

And here is the back -- I started out with orange thread in the bobbin and when that ran out, I switched to grey.


Friday, July 5, 2013

First Day Out With My New Foot


I have mostly finished the thread work on the tulips and Rosie.  I decided that some more traditional quilting in the background would be a nice change from all the intense threadwork on the rest of this quilt.

For quilting and thread-painting, I have been using the same foot I purchased with my sewing machine some ten years ago -- I can't believe it's been that long.  It's a clear circle and has worked pretty well up 'til now.  But I wanted to do some really tight quilting around these lovely feathers and I just couldn't see through the plastic well enough to do it.  


So I finally broke down and got an open darning foot.  Fortunately, I didn't just start right in on my Tulips and Rose quilt because it works very differently from my old foot.  I made up a sample with the same fabric and wool batting.  I used the blue washaway marker and drew some feathers.  


It took a bit of practice, but I have gotten the hang of it.  It's interesting (to me, anyway) that my freemotion feathers are better than the ones I did stitching along the lines I drew.

I'm linking up with FMQ Friday today.

Saturday, December 1, 2012

A Journal Cover to Give Away

But not here...

I was inspired by one of the prompts in the books I'm reviewing tomorrow on the "...Fire" blog.  I made a little circle template by tracing around the bottom of the bottle and getting out the deColourant spray that I haven't had a chance to play with.  I sprayed a half dozen circles down the length of a half yard of Kona black.


Then I wet the fabric, scrunched it up,  poured diluted copper fabric paint over it and let it dry for a couple of days.

I love the texture -- the little circles looked like moons over mountains to me, so I went with that.

I layered it with a piece of cotton batting and quilted it using cotton threads in several colors.  Then I traced around the journal and cut out the part I wanted.


Because old books often had marbling on the inside covers, I dug through my stash of hand-marbled fabrics and chose this one.

Here is the inside of the cover -- I used a plain piece of Kona black to line the inside of the journal cover.


This is a shot of the backside of the covered journal.

There are detailed instructions for making a journal cover here.

I'm linking up with Nina-Marie's Off the Wall Fridays -- even though it's really Saturday.


And here is a shot of the front.  I will be giving this away in our December giveaway and book review on ...And Then We Set It on Fire.  Check out tomorrow's post.  

Sunday Update: click here to go to the ...Fire blog and leave a comment to win this book!

Wednesday, September 26, 2012

Hummer Progress


I finished the painting part of my interpretation of Statia Dougherty's wonderful hummingbird photo.

I really like these paints from Prochem.  They behave like Setacolors (long my faves), but I think the colors might be brighter and more intense.  They're cheaper too and since I can no longer obtain Setacolors locally, I have to do mail order.  The only thing I don't like is the little jars they come in.  I made a bit of a mess pouring them on my palette.


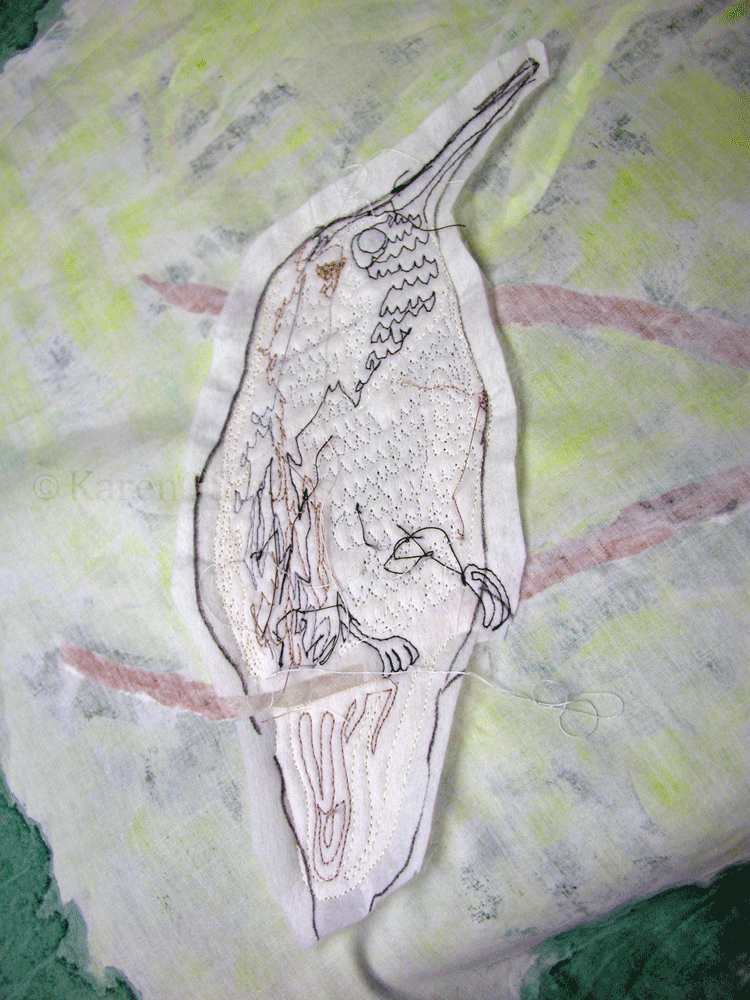
I wanted the hummer to stand out from the rest of the quilt, so I added wool batting and stabilizer (I used DecorBond by Pellon).  Then I added thread.  I used 50 weight Aurifil.


For Beth: here is the back side of the bird after adding the thread.  No, I didn't trim the threads very well.

I left a bit of the stabilizer extending beyond the edge of the bird so that it would get caught in the quilting and make the bird stable.

And here is the finished hummingbird before I layered and quilted the rest. 

Thursday, September 20, 2012

Finished Quilting, But Oh Woe is the Thread


I finished up the quilting on the four hibiscus series quilts.  I will feature them individually in photos after they're bound.  I used mostly Aurifil threads -- the 50 weight spools -- for the leaves, flowers and beetle.


I had a lot of trouble with the background quilting.  I used some thicker threads and had skipped stitches, broken needles, and nests on the backside.  Not to mention the fraying -- arrrrggghhh!

I tried a series of different needles -- some worked better than others -- none was great.  The best was the 90/14 topstitch needle.  With a bit of silicon dripped over the eye.

But I still had trouble with fraying.  And I used threads from both YLI and Superior.

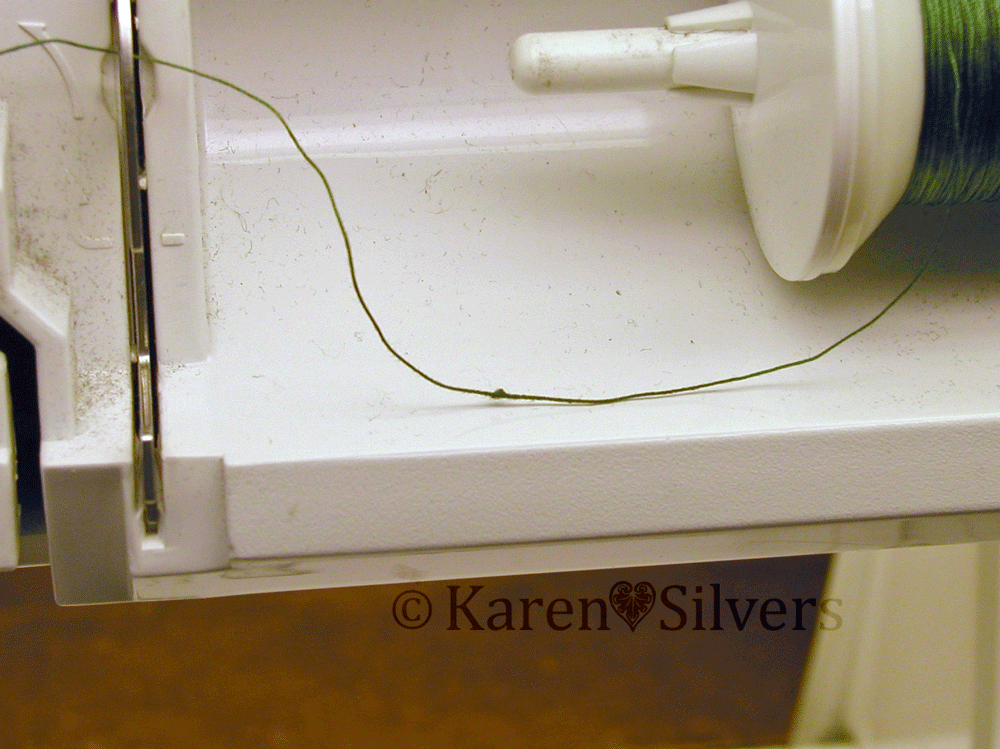
I've used the Superior King Tut a lot for quilting and this spool has been in my stash for a while -- it's not really old, but it's not brand new.  I was a bit horrified to see this little glob of fiber when I opened up the top to see what the spool was doing.  My LQS was happy to replace it, but they didn't have any in this same color; so it's on order and I just finished up using the rest of this spool... after I cut out the wee glob.

And here are the backsides of two of them.  I was sick of shopping in my stash and trying to decide which of my precious fabrics would be ok to "waste" on the back of my quilts.  So I went to my local Mega Fabric and Junk Store and purchased a bolt of inexpensive cotton that was a bit thicker than the stuff I use for piecing and my experiments.  I used a coupon, so it was pretty cheap.  I dyed the whole thing with leftover dyes and wound it back on the cardboard.  So now I have some special backing fabric that won't be "wasted" on the back.  And all that color hides anything I might want to keep quiet.

Monday, September 17, 2012

Three (mostly) Done, One to go


I've been  working on my hibiscus series.

This is the one that was painted with acrylic inks.   I used a cotton batt and cotton threads.

This was painted with thickened Procion dyes.  I used a wool batt for this one and cotton threads.
 

This was painted with Setacolor fabric paints and uses a wool batt and cotton threads.  I haven't finished the quilting here -- there will be more on the flower to highlight the petals.


And for Beth (who blogs here and to whom I owe a really long email) -- here is the backside of the acrylic ink piece.

I stupidly used a piece of white fabric -- it also features little white stars-- and so every stitch (and every mistake) shows.  I have had a lot of trouble with the thicker threads breaking.  I switched to a different type of needle late this afternoon and it was better.  Not great, but better.  I'll post about my needle troubles later.

I'll also post a picture of the backsides of the others -- but this will require a separate blog post, 'cause there's a secret back there...

My design wall looks the same as it did last time I linked up with Judy's blog, so I'm sharing these instead.  Click here to see some other people's design walls.  

Monday, August 6, 2012

Back to the Series


On this first Monday in August I thought I'd share a shot of three of the four hibiscus series that I've painted so far as they appeared on the design wall before I layered them in preparation for quilting.


I used a little bit of foil and Misty-fuse to make the beetle sparkle on this resist/dye-painted hibiscus.


And a bit here on this dye-painted one too.  I'll hit it with thread when I do the quilting.

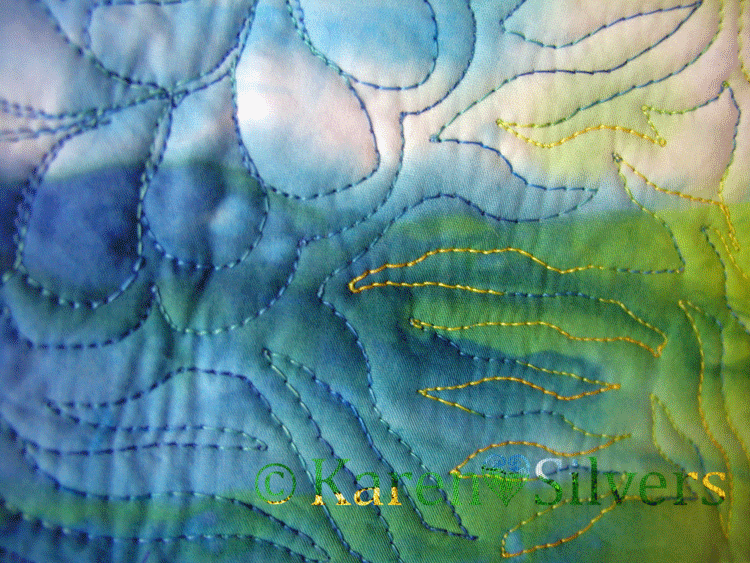
I have nearly finished the quilting on the acrylic ink hibiscus.  I was a little stumped about what to do in the background; but after I examined the original photo I realized that in the greenery of the background, there were lots of buds among the leaves.  And hibiscus buds would be a lot of fun to quilt.

Then I had to decide what color and weight of thread to use.  I used a variegated green 40 weight King Tut thread here.  I'm still debating what color/weight to use in the black areas of the background.  I can't rip out thread on this acrylic ink-painted piece because the holes will show (guess how I know that).  So I have to get it right the first time.

No, you can't see the back yet...

Tomorrow I will post a tell-all about how I did the resist/dye-painted hibiscus on the left in the photo at the top.

Until then, there are design walls aplenty at Judy's blog (here).

Monday, July 9, 2012

Taking Advantage of a Situation


As long as I had the table, I figured I should take advantage and do something else.  I haven't really ever worked in a series, but I like this photo and it seemed like a good idea.


I haven't done any dye painting in a long time.  I have lots of dye thickener in my refrigerator from some "...Fire" blog experiments.  And I have the table.

I have some fabric in the dye studio (AKA the NE corner of the garage) that was in a box labeled "soda soaked fabric."  I took a piece that wasn't too wrinkled and taped it down over the plastic protecting the hibiscus pattern.  

I hope this works.  I don't know how long that fabric has been in there.  I don't know if it is really soda soaked.  The dye thickener was on its last legs -- I tossed the remainder after I finished painting the fabric.  And the trouble with dye painting is that I haven't done it in so long, I had to get out my notes.  I hope I mixed it up right.  I won't know until after it batches and is washed out.  This is somehow worse than the usual excitement with dyeing.  I hope this works...


And instead of my design wall, the action is all under the needle today.  I have started quilting the ink-painted hibiscus.

To see what people who are using their design walls are doing, click here to go to Judy's blog.  

Saturday, June 23, 2012

"Poseidon's Epic Adventure" Wins a Ribbon at NQA


I am too busy with a family visit right now to enjoy any creative time by myself, but imagine my surprise when I opened the boxes from the NQA show with my returned quilts!


Poseidon won a ribbon!  For Most Effective Quilting!


"Poseidon's Epic Adventure"

20" by 20"


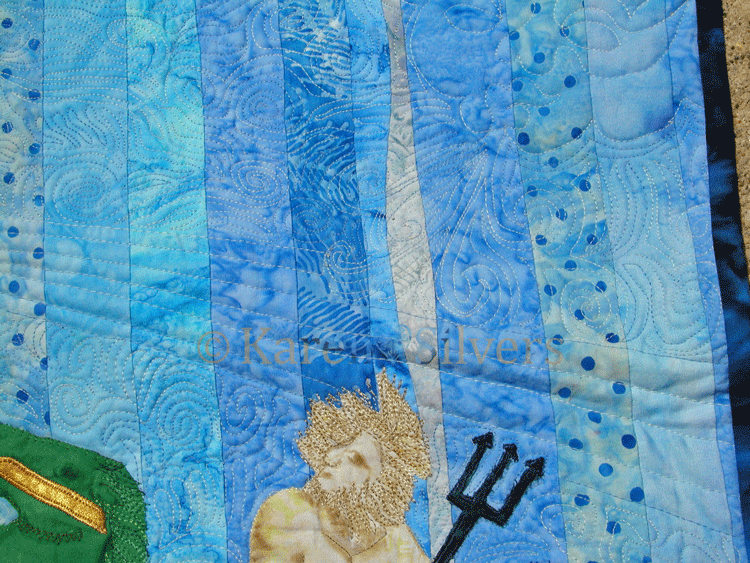
Here is a detail shot showing the wind blowing on Poseidon.


And for Beth, the backside:

Thursday, May 10, 2012

Appliqué and Quilting Update Thursday


I've gotten over myself and started stitching Poseidon.   I did a satin stitch around his trident before I layered it. And after I did a little bit of stitching, I realized he needed a bit more muscle definition.  So I got out my Tsukineko inks.

This is the backside -- I've finished the sky and done Poseidon's preliminary stitching.  Click on the picture to examine the stitching.  To see other appliqué projects, click here to go to Angie's blog.  


This is Scout.  He's a loaner -- his family went out of town (to see the eldest girl graduate from college!) and so he's staying with us.  He has settled right in as a studio dog.  

Monday, May 7, 2012

The First Stitch is the Hardest


I've come a long way since I began quilting.  I used to love only the piecing and the shopping -- not necessarily in that order.  Then I learned to love the appliqué and the embellishment.  Somewhere during all of this, I discovered I loved design.  It took a long time before I was comfortable with the quilting part.


I was always afraid I was wrecking my beautiful quilt by quilting it.  So I did just the minimum amount possible to hold the layers together.  Then I learned that I could quilt the devil out of a small quilt.  In fact, it was not only fun, it was easy!


 And from there I went to bigger and bigger quilts.  It's still physically hard to quilt really big quilts -- I have found that I need special "quilt muscles" to move all that fabric and batting through my little machine.  But I can do it.


And I've gotten so much better with practice.  Now I often design my quilts with the quilting in mind.  But, oh, that first stitch.  That first stitch is the the hardest.  Once I've gotten warmed up, I'm okay.  But the little "practice sandwich" just isn't enough to get warmed up.


That first quilt stitch on a layered "real" sandwich is still the most difficult.  So sometimes, I just go around the elements.  Just to get the needle in there.  And some thread.  Then I can move on to the more creative parts.  Just after I get that first stitch in...

There is nothing on my design wall today because it's all under the needle.  The top photo is my current project.  I've finished the first stitches outlining some of the elements -- so it's on to the rest.  The part I love.    Check out Judy's blog (here) for some real design walls.