Showing posts with label bags. Show all posts

Saturday, April 26, 2014

Suede Clutch Bag

I fell in love with this bag I saw online.  It was suede and had lovely beading.  Sadly, it was too costly for my budget.  Even more sad, it was sold out.  So I thought, well, I can make one.  In better colors.  With better beading.  Right?

But it was suede.  Hmmm... haven't worked with leather before.  Well, except when it was still on the hoof.  And on the other side of the lens.


So what to do?  I got the bright idea of hitting the thrift shops.  I have seen lots of leather jackets, but maybe there would be some skirts.  They would have relatively large pieces of, um, material.  Right?  Well, I scored.  I found three fairly large-sized skirts and threw them in my washer and dryer.  Yep, even the one that still had its tags.  

I made a pattern with freezer paper and found this outstanding brocade for lining.  

I wanted to edge the inside pockets with the leather.  I discovered that paper clamps worked well to hold things together while I sewed.


I used a magnetic snap to secure the flap.

And made a large zipper pocket using some of the skirt lining for pocket lining.


Here is a view of the inside.  Fully lined.

And the front with the flap flipped up.


And the finished bag.  It's 9 1/2 by 12 inches.  I plan to add another tassel to the side -- can't have too much fringe.  And after I use it a bit and ascertain that I like the size and all, I'll make one with beading.

Sunday, September 29, 2013

A Quilter's Dream at Quilt Expo


 I posed for several photos with my quilts at Quilt Expo this year, but this was the only one I could find on FaceBook.  That's me in the red shirt helping to hang the show.

I had to sit on my hands to resist typing "does my bum make this quilt look fat" in the comment section!


I had the pleasure of working with Stephanie Prescott in her booth "A Quilter's Dream" this year.  She has fabulous quilt and bag patterns and designs some lovely batiks.  I made this bag from her pattern "Metropolis" using her batiks for the buildings.  The sky fabric came from my stash.  


It was easy peasy to make -- the directions are very good.  Of course, I had to modify it a bit -- I added the extra pocket inside the large one -- for keys or a cell phone, and I added a magnetic snap for closure.


And this is me with Stephanie.


Tuesday, May 21, 2013

Eeny Weenie Teensy Tiny Mini Margo Bag


Introducing the tiniest Margo bag ever!  It's six by seven and a half inches.  The little owls are only about two and a half inches high.  I was lucky to find the little owl charm for a zipper pull.


My DD loves owls and when I saw this fabric, I had to make her a bag -- she loves tiny bags, so I made it mini-sized.  I got the owl pattern from a friend's magazine (thanks, Fran).  It was an issue of Simple Quilts & Sewing from last fall.  I sewed a fabric loop into the back seam of the second owl (I forgot or I would have had to make only one) and attached it to the bag with an old key chain loop.


Inside are scaled-down pockets.  I halved all the measurements on the pattern to make this bag and added a bit of velcro to hold the small pocket closed for those things she wouldn't want spilling out of her purse.

After I gave DD the bag, I asked to see it one more time and she had stashed the extra owl inside the pocket!

I used my trusty Margo bag pattern from Lazy Girl Designs and a seven inch skirt zipper from my stash -- I wasn't sure the red would go but I like it.  And it coordinates with the tiny owls.

Friday, November 23, 2012

Mul-tex Part 2: the Bag


I started with some acrylic paint and this nifty stencil Prochem sent me with my last order.  The Mul-tex is taped down because it has a nasty habit of curling on itself.

Here is the finished part of the black paint.  I used some extender medium to thin the paint and make it a little less opaque.  I'm painting on the shiny or laminate side of the mul-tex.


I let the black paint dry and then sponged red over it.  I used a primary magenta and quinacridone burnt orange paints thinned with fluid matte medium.  I wanted it to be kind of a wash over the black stencil, so I mixed it pretty thin.


After it dried (this is my kitchen table and DH didn't want any paint on it), I flipped it over and taped it down again -- it's still trying to curl.  I got out the gold and stenciled some cranes on the mulberry fiber side.

After it dried, I cut the mul-tex in half and layered each side with black batting and stitched all over.  I used red thread on one piece and black on the other.


I made it an odd shape because I thought it would look better that way.  I prefer the side that was stitched with the black thread.


And I lined it with a piece of red hand-dye.  I know the zipper is a little strange, but I didn't have a red one handy.

Monday, November 19, 2012

Messing Around with Mul-tex


I was given some Mul-tex in exchange for the creation of samples of things that could be done with this stuff.  Mul-tex is mulberry paper on one side and a shiny laminate on the other.  I made this art quilt and the little bag.  In the next two posts, I will outline the techniques I used to create each of these.

---Stay tuned...

Friday, April 27, 2012

A New Book, New Fabrics, and a New Finish

First up:  I'm a winner!  Intrepid writer, quilter, dyer, and all-around-famous-person Laura Wasilowski chose me as winner of her latest book: Fanciful Stitches, Colorful Quilts!


This book appeals to me on several different levels. It has easy projects featuring really bright hand-dyed fabrics.  As people who know me know, those brights are near and dear to my heart.

It contains several pages of embroidery stitches.  I already knew how to do these stitches, but it's handy to have them together and illustrated with really bright threads.   Also, Laura combines them in interesting ways and has before and after photos of quilts showing the impact of the embroidery.  And I love the chart that shows which needle to use with which size thread.

But best of all, it's a recipe book for quilts that seeks to teach and inspire, not just provide rote follow-my-pattern stuff.  In my favorite of the "tip" boxes scattered throughout, Laura suggests: "Add your own creativity.  Cut fabric shapes freely or with decorative blades.  Ignore the photo and placement guides and arrange the design elements to your liking."  Yes!  Thanks, Laura!

 These are my latest monoprinting experiments.  Nienke blogged about it here on the "...Fire" blog.  I used thickened dyes instead of the soap trick.  They don't look much like flowers to me -- more like sea creatures.

I've been playing around with flour resists again.  I did these with rice and wheat flours and some plastic stencils.


I'm going to be experimenting a bit more with these before I post a how-to.  I like them, but I'm not thrilled with the results.  More on that later.


I finished the Japanese Taupe Blocks bag. This is the inside front of the bag.


And the backside.


I added a zipper compartment inside.

My favorite parts of the bag are the box pleats on the sides.  The instructions for this are in the book we're using for the 2012 BOM here.  The author, Susan Briscoe, has a blog here.


And this is the appliquéd front.  I love the way this turned out.  I am considering making another.  In eye-popping brights this time, though.  And more pockets inside.

To see some other appliqué projects, click here to go to Angie's blog.  

Monday, April 23, 2012

Design Wall Stuff


Today my design wall shows a bit of progress on Neptune/Poseidon.  And a bunch of other stuff -- I love those two reddish monoprints and I'm still not sure where I'm going with the stuff on the right.

I did finish quilting the squares for my new bag.  Now I just have to assemble them.  Of course, it's not that easy.  I want to put a zipper compartment inside and that's not part of the pattern, so I'm going to have to rewrite it.

Check out other design walls here on Judy's blog.  

Friday, April 20, 2012

On Friday, Appliqué Update Thursday


I have returned to the Poseidon piece.  In the moving piles of stuff around that passed for creative endeavor this winter, I lost his trident!  He can't be Poseidon/Neptune without it!

But I found it.  Under a stack of fabrics vaguely related to this project.  I am still playing with the seahorses.  That bit of fabric where a horse tail would be is a fin.  That I'm not finished with.

I got out the Tsukineko inks and gave Poseidon/Neptune some features -- hair, eyes, and (ahem) some muscles.  I also did a little bit of inking on the seahorses and the turtle.


 And I have finished this needle-turn appliqué block for my new bag.  I used variegated perlé cotton thread for the running stitches in the center of the flower.  I had to do the set-in circle more than once.  The first time, I cut the circle from the butterfly background too large.  So the hole was too large.  Then I cut it out correctly; but when I went to square up the block after the machine stitching, I cut the block too small.  So I picked out the stitching and made another butterfly background piece.  The third time was a charm!  Not too big or too little, but just right.

To see other appliqué projects, click here to go to Angie's blog.  

Monday, April 16, 2012

Design and Flowers

On my design wall today are three blocks for my latest bag.  I finished this much of the appliqué on the leftmost one.  It still needs a center and a bit of embroidery, then I'll be able to make the bag.


 And while last night the temperatures plummeted from lovely spring to late fall, I have an assortment of pictures of spring flowers.

These seem really early this year -- no doubt a result of record-breaking March temps.

 These irises greeted me this morning.  Last night, they were tightly budded.


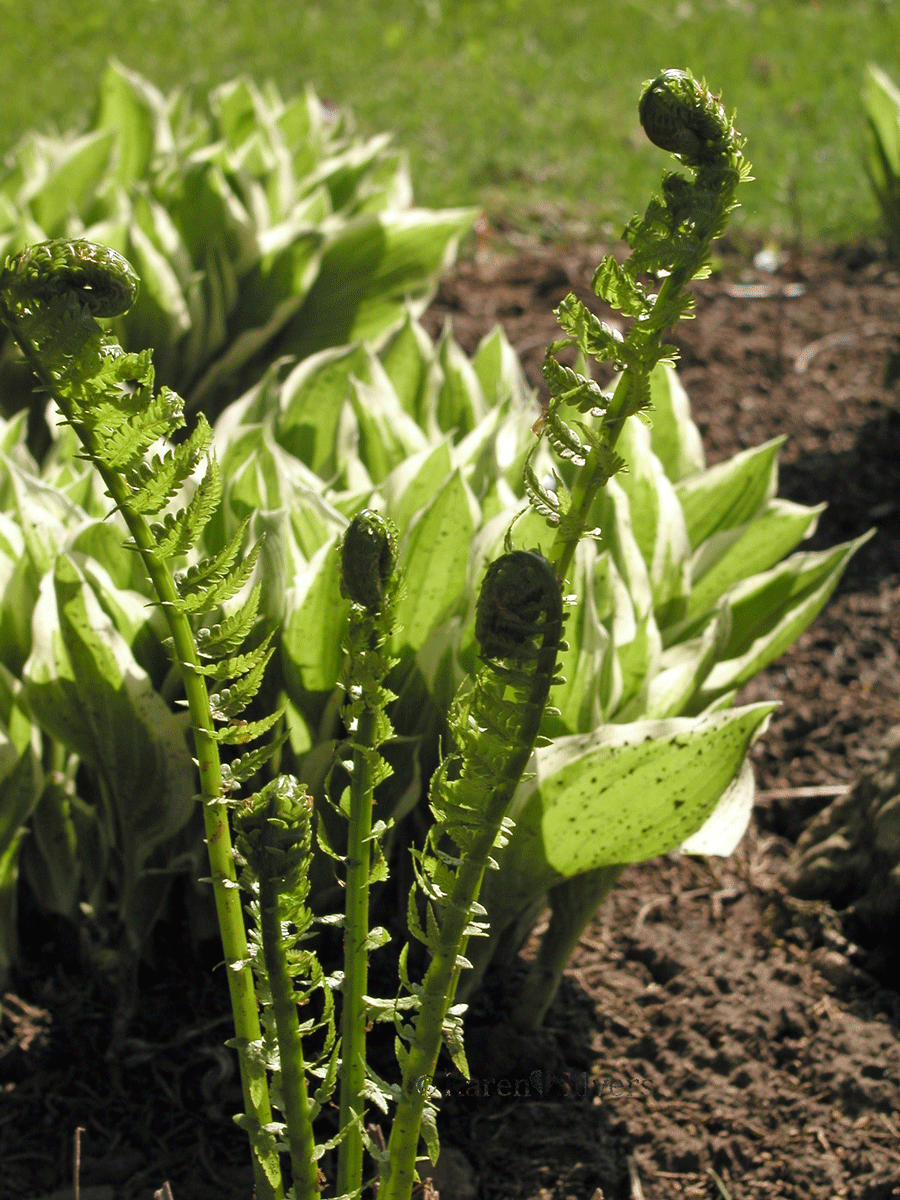
I love the ferns as they're preparing for their final unfurl.


 And the stupid fake fruit tree is in its week of glory.  It is covered with these masses of white blossoms.  I cut off all of the low hanging branches last summer so we could mow the lawn without decapitation worries.  The branches that are left have gone out of their way to make up for the missing limbs.


And because I haven't posted one in a while, here is the gratuitous dog pic.  Rosie loves the snow, but she enjoys spring mud also.  This is after the bath.

There are other design walls here on Judy's blog.

Tuesday, April 10, 2012

Tuesday - Monday Design Wall

Yeah, I'm a bit late on this -- my design wall for today holds a bunch of unrelated projects:


I'll "splain these below, but first -- a report from my 2012 BOM group (more about that here) -- yes -- I was finally able to attend.  And I had this month's assignment finished!


 This block is called "Kakuyose" (Parquetry angles).    


Then we started arranging them -- it would make me crazy to make this many of a single block -- but it's a lot of fun to have them all to play with.

I usually do this in EQ7, but it's great to see them in "real time."


And the whole group on point.

This is "Kunojiki sujikai" or simplified right-angle braces.  I like the way some people used the background fabric -- the two on either side of the one in the top middle are really nice examples.


 "Tokiwa gaki" (Ordinary fence) Not so ordinary, if you ask me.  You might notice that the one on the top right has fence posts that hang off the bottom a bit -- that's what happens when you measure the center piece at 4 inches instead of 4.5 like the directions say (yep -- that's mine.)


These blocks are from the same book -- I did them in the spa blue and brown combinations because I want to use them to make a bag.  
And this is prepped for the appliqué block that goes on the front of the bag. 


This stuff on the left is also for a bag -- it's free-form pieced and I'm thinking of using it for my new spring bag.  I'm not crazy about it yet, so I'll have to do some more to see where it takes me.

To see more design walls, click here to go to Judy's blog.

And I haven't forgotten that I was going to post pictures of my latest screen print experiments.  The kids were off for spring break and I got busy.  Also, Mr. S finally made some new screen frames for me -- I haven't added the silk screen to them, but maybe by next weekend...