Showing posts with label challenge. Show all posts

Friday, April 17, 2015

Spring!


So I needed something to perk up the log cabin blocks in the previous post.


I drew an iris on a piece of freezer paper and used it for a pattern.  I cut out a piece of stabilizer (it's at the top of the photo).  The I pinned a piece of fabric to the freezer paper and colored in the iris with my Tsukineko inks.


I cut out the fabric iris and fused the stabilizer to the back.  Then I used fabric glue to turn the edges over the stabilizer.

Clearly I didn't measure so well, because there is a lot of white sticking out around the edges.


So I got the inks back out and colored in the edges.


I pinned it to my log cabin background -- see the previous post for more about that.


I did a lot of stitching on the iris to give it texture before I layered it with the batting and backing.


Here is a shot of the backside before trimming and binding.

"Spring"
13" by 17"


Linking up with Nina Marie Sayer today at Off the Wall Fridays and Marrtje Quilting in Amsterdam.

Thursday, April 16, 2015

Garden Logs

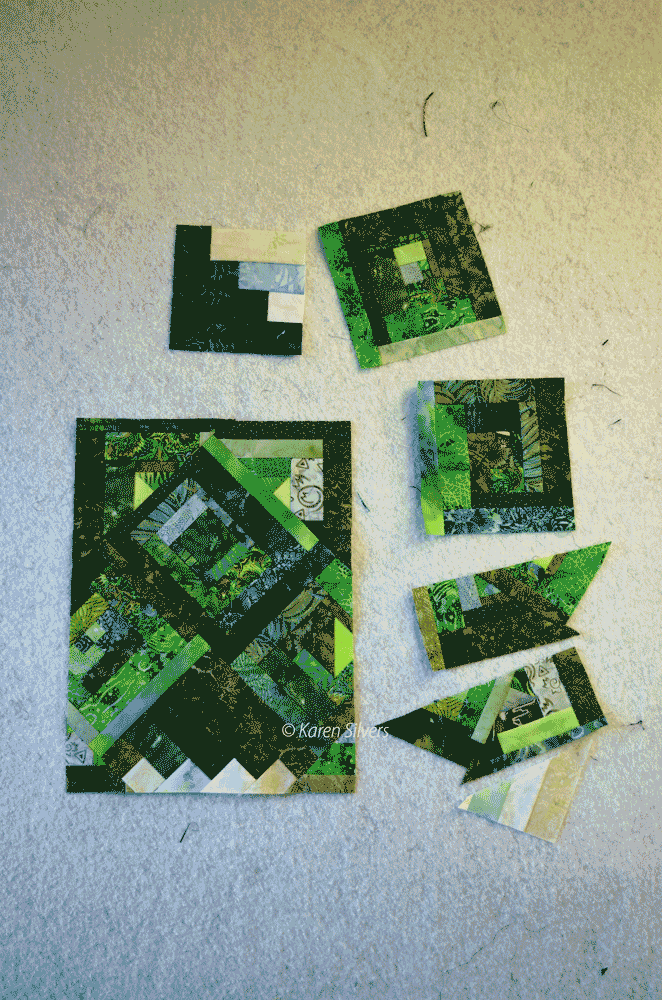
I had a couple of blocks left over from the background of the egret challenge and needed some log cabin blocks for my guild challenge.


So I made a couple more blocks and stitched them together.


Then I cut them down to size so that I could use them for my Art Quilts Around the World challenge.


Thursday, March 5, 2015

Spring is Coming in...


"Two Shakes"
36" by 36"

It was sunny today,so I posed my lambs on a snow bank.


And a couple of detail shots.

I think I need to add a bit of ink or paint to the flower stems.  I quilted them in, but I think they would benefit from a little bit more color.  Or maybe not.  *smile*

Now that it's all finished, I think the legs on the left lamb look a bit awkward in the photo.  But then spring lambs are new at standing, aren't they?  

Linking up with Nina Marie Sayer today.

Friday, February 27, 2015

Spring: it's coming again

Actually it came and went.  I wrote this post last April and just finished it.

Okay -- maybe not here in Wisconsin.  But for most of the northern hemisphere, it is.  My guild, Lodi Valley Quilters Guild, has a spring challenge each year that coincides with Quilt Academy.  A choice of three classes are offered from a long list of possibilities; it's a really big deal.  I'm on the committee (I redesigned the brochure this year) so I felt more than obligated to finish my challenge for the quilt display we did with it.

The challenge fabric was this floral.  
 Totally not my style.  But I had to use some of it.  On the front.  Hmmm...

So I got this idea of spring animals frolicking in the flowers. I ironed fusible web to the entire fat quarter.  Then I sat at a meeting and later in front of the TV and cut out individual flowers.  I made it easy on myself and used textile glue to fasten the sheep parts to the background for quilting.


I pinned a thin cotton batt to the back and stitched all the lambs' wool with Aurifil thread.  Here are the finished lambs before I cut away the batting and layered it with the final wool batting.


I will post a photo of the finished piece in a week or two after the show on April 5.  I might have some fun photos of the guild members then too.

Okay, this is not true.  I will post the finished project sometime this month.  OK.  I lied again.  It has been nearly a year and here it is!

Tuesday, September 30, 2014

Monochromatic 2 Challenge


"Gecko"
16.5" by 11.75"

This is my work for the "Monochromatic 2" challenge at Art Quilts Around the World. There is terrific texture that doesn't show up in this photo because it is cloudy today.  I will replace the photo when the sun comes out.


A detail of the eye.


And the back side.

Wednesday, June 4, 2014

Bollywood Challenge at Art Quilts Around the World


"Jazz Hands!  Bollywood Style"
11.5" by 16.5"

This is my finished piece for the Art Quilts Around the World Bollywood challenge.  I pieced the background with sparkly red fabrics from my stash, then machine appliquéd the hands.  I used a double layer of the sparkly gold fabric to make it show up well against the red background.  

I had planned on doing some work on the hands that would suggest henna designs, but I couldn't find a medium that would work on the gold fabric.  Paint didn't sit on top nicely (my original plan), machine thread didn't work at all, and hand embroidery didn't look right.  So for now, it's finished.  

Wednesday, March 26, 2014

Clara Ruth


For my January Challenge over at Art Quilts Around the World, the theme was Art Deco.   So I googled it and came up with lovely flowing images of beautiful women.  I got out my big pad and drew this woman.

I used a soft pencil and some Copic markers for the colors.


 I traced her onto this most excellent batik from my stash with a black Micron pen.  I layered it with wool batting and stitched over the lines.  I couldn't get to my paints -- we moved house recently, which should account for my lack of blog posting and internet woes -- so I used the Copic pens for her eyes and lip colors.

I wish I had used something other than black marker for the tracing because it was a laborious job stitching on the lines.


"Clara Ruth"
11" by 14"

I used copper Setacolor paint for her locks and Auriful threads for all the stitching.  Her name was chosen by googling the most popular girls names for that era.  My daughter and I agreed that we thought Clara Ruth was beautiful.  


Tuesday, April 16, 2013

Celebrate the Dragon


"Celebrate the Chinese New Year"
27" by 27"

Turned-edge appliqué on a machine-pieced background, hand-dyes, commercial fabrics, cotton and rayon threads


Friday, February 8, 2013

Celebrating a New Beginning


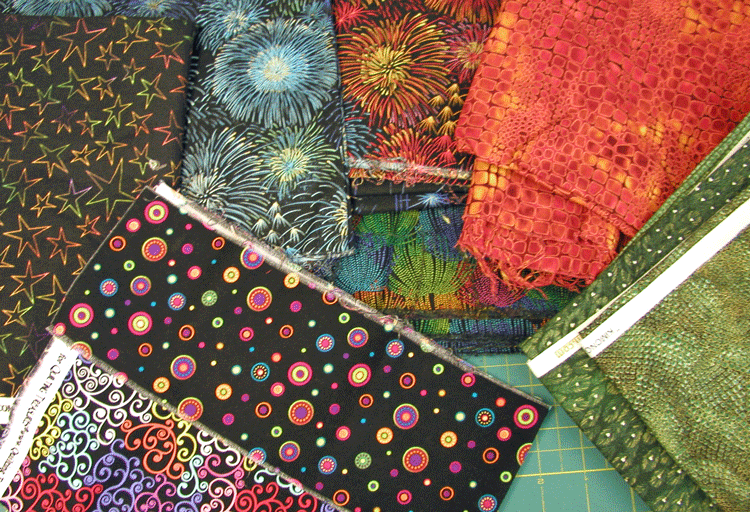
 I'm working on a challenge that is due next month.  I have to use these two fabrics and the theme is "celebration."


The first thing I thought of was fourth of July -- Independence Day.  The fabrics at the top left illustrate that theme.  But then I thought, hmmmm...that's a little vague.  So I brainstormed another idea.  


I took a whole day and made a pattern from freezer paper.


And pulled some hand-dyes from the shelf to go with the sparkly fabrics.

I'm doing a form of appliqué that I will explain in a future post.  It involves the aforementioned  freezer paper, a magic pen, an iron, and some glue.  And thread.  Lots of thread.

Later, there will also be some paint and some machine piecing.  I'm going for the full range of techniques here.

I'm linking up with Nina Marie at Off the Wall Fridays.


Wednesday, August 18, 2010

Small, Green, and Gorgeous Challenge


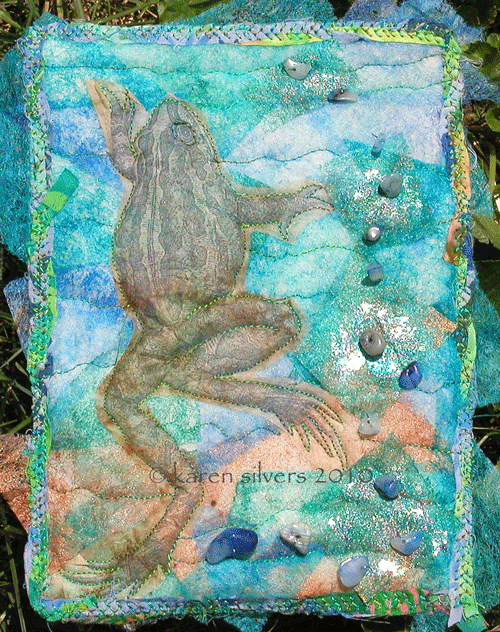
"Small, Green, and Froggeous"
5" X 7"

This was created for a challenge to Madison Contemporary Fiber Artists for a piece of environmentally concerned art.  It will be on display with others from this challenge at the Madison Senior Center on Mifflin Street, Madison, Wisconsin, during the month of September.

I painted used dryer sheets, then cut them up and fused them to a piece of batting which was stuck to a scrap of stabilizer.  This was inspired by Terri Stegmiller's "mosaic collage" technique.  I printed the frog image onto a used tea bag, cut it out and stitched it to the collage background.  Then I stitched some more and added the little stones that were left over from another project.


In the interest of reusing -- I have to compliment my garden.  I planted these tiny yellow light-bulb shaped tomatoes a while ago and every year since, they volunteer.  By August, we have to have tomato salad twice a day to keep up with the production.  What a problem to have.

The flowers reseed themselves too.  Yes, this is the garden in front of my house -- the one where most people grow, um, ornamental items.  I grow tomatoes, peppers, beans, basil, garlic chives, oregano, thyme, parsley, cilantro, and flowers.  I also grow rosemary, lemon grass, chiles, tomatoes, and beans in pots.

On a good year, I grow zucchini  -- for some reason, it's not growing this year.  But we did have some kind of pumpkin volunteer -- I must have thrown some seeds there when I did the jack o'lanterns last year.  Trouble is, the bunnies keep biting off the flowers.   This is the best place on my property to grow things, so I use it.  And I think it's all kind of pretty.  And even the neighbors would agree -- it's better than the ugly overgrown bushes that used to be here.

Sunday, June 20, 2010

Don't You Just Love

starting a new project?

I love this face!


I have a challenge in which I must use this fabric:


I have pulled these fabrics from my stash:


And I have a roadmap:


Time to get mooing (whoops -- sorry, I just couldn't resist).  More later.

Wednesday, February 3, 2010

Fiesta!

"Fiesta Dreamin'"
10" x 14"


The February challenge for the After Dinner Journal Page is "Mexican Fiesta." Upon hearing this, I immediately began to salivate: grilled foods wrapped in freshly made tortillas topped with salsa and avocados, smell of mesquite smoke hovering in the air, ripe, juicy tropical fruits, all accompanied by live musicians playing their hearts out. Then, I looked out the window. KZZZZZAAARRRZZZzzzkkkk (that is the sound made by a needle dragging across a record)!

A few more inches of fresh snow came down today. It's warmer, but hardly fiesta weather. So I cleaned up the drool. I thought of a beautiful dancing señorita with her swirling skirt and colorful, embroidered blouse. But I couldn't do justice to that in the two hours that the challenge allows.

Then I remembered that The Amazing Melody Johnson (who blogs here) did a piece called "Matchstick Moons" (which is here) that I really liked. So I decided to purloin her technique and make it my own.

First I gathered up a bunch of my favorite hand-dyes. I find myself really craving bright colors like these by this time of the winter.

Then I cut out some simple shapes from freezer paper and ironed them to the turquoise fabric.

Then -- this is the fun part -- I cut matchstick sized pieces on the bias from the fusible-backed hand-dyes and scattered them around the freezer paper shapes. I pressed and steam-set the whole thing (I had a blast getting it from my cutting mat across the room to my ironing board without losing any of the little pieces -- that was an exercise in creativity all by itself).

I removed the freezer paper shapes and the hat looked a little boring, so I added some little bits of red to jazz it up.

I layered it with black batting and some stabilizer on the back. It's a bit bigger than the 8 1/2 x 11 inch size the challenge requires, but I plan to cut it up and turn it into Artist Trading Cards (ATCs) to trade at Festival in Chicago this spring. Hopefully the quilt police won't come and arrest me first. I think that the black batting will look good peeping out from behind the colorful threads I'm going to zig zag over the edges.

Tuesday, January 26, 2010

Sinuous Curves and the Last Sneak Peek


This is the last sneak peek of my nursery rhyme challenge quilt. The background is made from sky fabrics with stars and clouds using pieced curves to simulate the ocean.

I cut lengths of fabric at two to four inches wide.

Then I laid them on my cutting mat with right sides facing up and overlapping about an inch. I used a small rotary cutter because I feel like I have a little more control with it. I cut gentle curves, careful to stay within the overlap of the fabric. I removed the scraps and lined up the strips.

Then I flipped the end piece over and lined it up so that there were hills and valleys and I put in a pin where ever the fabrics crossed.


I took it to the machine and used tweezers to gently pull out the "bellies" so they matched up when I sewed them. This is one case where bias is your friend. I gently stretched the fabric so that the edges matched when I sewed them.


It's good to use a poker to help guide the fabric. If you aren't lucky enough to have a friend bring you a porcupine quill from South Africa, you can buy a bag of bar-be-que skewers from the grocery and you'll have a lifetime supply.


After it's all sewn, you iron it gently along the new seam, then flip it over and iron on the right side and...


VOILA! Perfectly flat curved seams!

I know I changed fabrics in these pictures -- I took lots of pictures because there are always a bunch of blurry ones. I posted the best ones to show each step and I apologize in advance if the different fabrics cause any confusion.