Showing posts with label hand-dyes. Show all posts

Thursday, March 5, 2015

Spring is Coming in...


"Two Shakes"
36" by 36"

It was sunny today,so I posed my lambs on a snow bank.


And a couple of detail shots.

I think I need to add a bit of ink or paint to the flower stems.  I quilted them in, but I think they would benefit from a little bit more color.  Or maybe not.  *smile*

Now that it's all finished, I think the legs on the left lamb look a bit awkward in the photo.  But then spring lambs are new at standing, aren't they?  

Linking up with Nina Marie Sayer today.

Tuesday, October 14, 2014

Autumn Leaf Warm-up


I used this wonderful tutorial for an oak leaf and acorn to warm up.


It's available at: http://theinboxjaunt.com/2014/10/14/the-oak-leaf-and-acorn-free-motion-quilt-tutorial/


  And the finished motif with an additional line of quilting around the leaves.  I used a piece of my own hand-dyed cotton sateen, a wool batt, and a bit of decor-bond to stabilize the back. I think it would be nice as part of a bag.  

Monday, September 29, 2014

Around the World Blog Hop


I have not been a very good blogger of late.  Life keeps getting in the way of blogging.  I was invited to participate in a blog hop by my good friend Beth (who blogs here).  I was supposed to nominate three more to participate, but I procrastinated too long and couldn't find any one.  So any of my regular blogging friends or anyone who is not yet a friend who would like to participate and be one please comment below and I'll add you to the post.

I am supposed to answer four questions:

What am I currently working on?  Well.  I have several projects going on.  The photo above is the one I promised a month or so ago when I expressed my dissatisfaction with my current projects.  I got out the Caribbean hand dyes and paired them with white and viola!  Beautiful ocean colors that just make me happy, happy, happy!


And they pair so well with these beautiful greys that are so popular and readily available right now. 

Another project I am working on was going to be a blog post.  I will share it briefly here, but there will be more in the future.

Hexies!  I took this class on a whim at my guild's annual quilt academy and had no idea how utterly addictive these are.  

The other thing I am working on is my monochrome challenge for Art Quilts Around the World.  It will be revealed on the blog tomorrow and I will post here after that.  Stay tuned...

How does my stuff differ from others?  Probably because of my utter fearlessness to go where others fear to tread.  I mix traditional with contemporary with experimental.  I love to try new things and incorporate them into old things.

Why do I create what I do?  Simple.  It's cheaper than therapy.  I prefer to make stuff.  The alternative?  Ax murderer?

How does my writing process work?  This is a tough one.  I am a writer by trade and training.  I love to write.  Sometimes I include poems and short stories on my blog.  I would include food, but I fear it would take over.  I made a decision when I started this blog that I would focus on fiber and visual art, so adding some photography is ok.  I will save the food for another forum.  

Now thanks to Beth, I have given up more personal information than I am really comfortable with. I am trying to be a better blogger, but I have teens living with me and I would rather make stuff than write about it right now.  I have a couple of posts drafted, so I expect to improve.  Now I have to dress in my mother-of-the-teen clothes and go to back to school night.  -back soon!

Thursday, May 22, 2014

Blogger's Quilt Festival 2014


"Spectral Chroma"
92" by 74"
Adapted from "Twisted Ribbon Sampler" by Brenda Henning
Longarm Quilted by Nell Coons

AmysCreativeSide.com

This is my entry for Amy's Creative Side's Blogger's Quilt Festival 2014.  I think it would be wonderful as a viewer's choice or ROYGBIV.  

I made the blocks as part of my first Thursday of the month piecer's group at Mill House Quilts a couple of years ago.  Last year, I finally finished sewing it all together and for the first time, I had a longarm quilter finish it.

 Nell Coons was a part of the piecer's group for as long as I was and I was regularly amazed by her longarm prowess.  Nearly every month, she brought in the finished quilts of group members and I longed for her to quilt one of mine.  I needed this one finished for Quilt Expo and she said, "No problem."

She was supposed to bring it to the meeting before the Expo entry deadline.  She called me the day before and said she wouldn't be coming to the meeting, but it was finished and I could come to her home and get it.

Nell was a long time breast cancer survivor.  Unfortunately, while she was in the middle of quilting my quilt, the cancer returned.  She still finished my quilt on time.  And I was thrilled with it.  Sadly, she passed away shortly after that and never got to see it hanging in any of the shows.  She was a wonderful person and I miss her terribly.  My life is far richer for having known her.  

 I used my own hand-dyes, some that I dyed especially for this project, and Laurel Burch fabrics.
It sat for the longest time with only the little orange border until I consulted with a friend and she helped me design the final border with EQ7.  I had cut the border fabric before I started making the blocks, but the quilt grew too big and my cut pieces wouldn't make it all the way around.  So the New York Beauty blocks took up the space and finished it nicely.


I don't have any pictures of the entire back, but here is a shot showing the block I didn't like well enough to put on the front.

Tuesday, August 27, 2013

Alice's Flowers


I previously blogged about my friend Alice here when she asked for my help in creating a special hand-dye for her Wisconsin Wildflowers quilt.  I finally got to see the completed quilt and I think it's amazing. This is all hand-appliquéd and hand quilted.


If you look close (or click on the photo) you can see the purple and green stripe I dyed for the jack-in-the-pulpit block.

Wednesday, July 31, 2013

Opposites Attract?

Today is reveal day at Art Quilts Around the World.  The theme for this challenge was "opposites attract."


I admit, I had trouble with this one.  After discarding about a thousand ideas, I realized that I kept coming back to colors; I love that colors opposite each other on the color wheel are so pleasing together.  


So I finally just picked a couple and offset them with the black and white.  I used three or four different fabrics for each color -- the hand-dyes are all my own.  

I thought it looked a bit like an abstract feather, so I quilted it with somewhat traditional feathers, using bright, non-traditional thread.  

And here is the back -- I started out with orange thread in the bobbin and when that ran out, I switched to grey.


Friday, June 14, 2013

Tulips and Rosie - the Beginning


Usually the bunnies nibble the stems of the tulips.   Then the buds fall off and I never get to see them bloom.  For some reason, this year the *%$&! rabbits left my flowers alone and I took a series of photos with Rosie posing with the posies.

I need a piece with a botanical theme and I really like this shot.

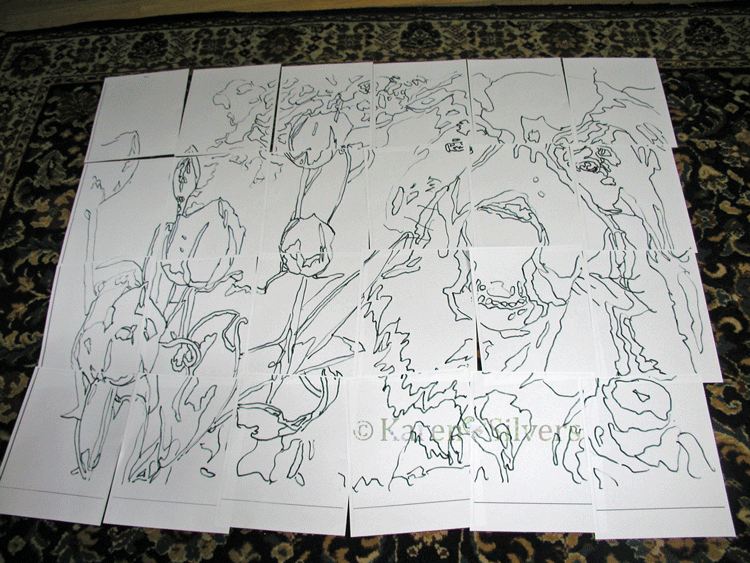
I wanted to work big this time, so I cropped it, converted it, made a line drawing, and printed out this pattern on my computer.  I laid it out on the rug and taped the sheets together.

note to self: next time vacuum up the dog hair before laying out the papers!


I traced it onto freezer paper and began cutting out the fabrics.  I'm using raw-edge appliqué for this with MistyFuse for my glue.

Getting the eyes done really makes a difference.


I made the tulips using Tsukineko inks on plain white fabric.  Then I fused them.  The pieces were just too small to fiddle with and I plan to cover them with thread anyway.

I'm linking up with Nina Marie at Off the Wall Fridays today.

Monday, May 27, 2013

Traditional Piecing (Traditional for Me, Anyway)


I have rejoined my First Thursday Piecers' group.  We're doing some pretty traditional style blocks this year -- so I've challenged myself to make two of each and then make them each really different.    I also decided to dig into my Laurel Burch stash -- the colors go so well with my hand-dyes.


There are only three blocks in this photo.  Can you tell which are the same? -- Don't count the little Lemoyne stars.


I also got out my copy of Marsha McCloskey's Feathered Stars I -- it took me a couple of tries to get just the right sized star for the center.


I drew it in EQ7 first to get the colors on the feathers right.

I've been working on it for a couple of weeks -- a little at a time.


And it's finally finished!

I'm linking up with Judy at Design Wall Monday for the first time in a while!

Thursday, April 25, 2013

Cuts and Pleats


 Above are the two pieces I chose to use for the cut and pleat portion of this project.  Instead of using the two that were most alike, I used the two that I liked the most.

I ironed fusible to each piece, then stacked them with one on top of the other, fusible sides on each facing down.  I used WonderUnder instead of MistyFuse because I ran out and the only store that happened to be open stocked WonderUnder.  It's not my favorite fusible -- it's heavy (I used the lightest weight) and I have the darndest time removing the backing paper.

I cut the strips a little more than half an inch wide -- about 5/8 inch.  Then I carefully put them onto a piece of plain cotton, two at a time.  I was very careful to keep them in order.


The top piece is the finished fused strips.  I really like it just like this.  I wonder if I would lose the pattern if I tried stitching together strips cut from two similar pieces.  Would too much get lost in the seam allowances?

And the finished pleated piece.  I'm not sure where I'm going to go with it from here.  I was thinking of making a bag, but it will be way too big a bag for me -- more like a tote.

I'm also wondering if stitching down the pleats going one direction on the top and another on the bottom would look good.  Or maybe one direction on the top and bottom then another in the middle?

Also, next time, instead of using the two pieces I like the most, I would use the one I like most and the one I like least and do the pleats on the one I like least because so much of the pattern is lost in the pleat.

I'm linking up with Nina Marie at Off the Wall Friday.

Tuesday, April 16, 2013

Celebrate the Dragon


"Celebrate the Chinese New Year"
27" by 27"

Turned-edge appliqué on a machine-pieced background, hand-dyes, commercial fabrics, cotton and rayon threads


Friday, February 8, 2013

Celebrating a New Beginning


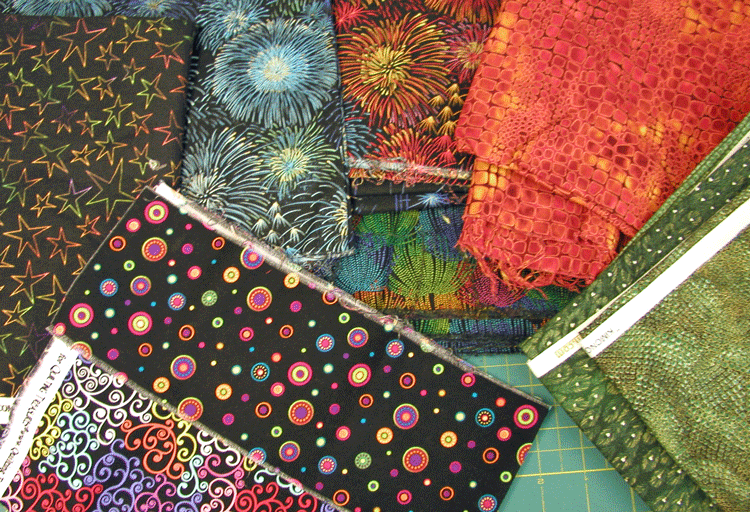
 I'm working on a challenge that is due next month.  I have to use these two fabrics and the theme is "celebration."


The first thing I thought of was fourth of July -- Independence Day.  The fabrics at the top left illustrate that theme.  But then I thought, hmmmm...that's a little vague.  So I brainstormed another idea.  


I took a whole day and made a pattern from freezer paper.


And pulled some hand-dyes from the shelf to go with the sparkly fabrics.

I'm doing a form of appliqué that I will explain in a future post.  It involves the aforementioned  freezer paper, a magic pen, an iron, and some glue.  And thread.  Lots of thread.

Later, there will also be some paint and some machine piecing.  I'm going for the full range of techniques here.

I'm linking up with Nina Marie at Off the Wall Fridays.


Thursday, January 31, 2013

Self Portrait Reveal

Today is the big reveal over at Art Quilts Around the World.

Here is the back of mine for those who are interested.

You'll have to click here to see the front.


Friday, November 23, 2012

Mul-tex Part 2: the Bag


I started with some acrylic paint and this nifty stencil Prochem sent me with my last order.  The Mul-tex is taped down because it has a nasty habit of curling on itself.

Here is the finished part of the black paint.  I used some extender medium to thin the paint and make it a little less opaque.  I'm painting on the shiny or laminate side of the mul-tex.


I let the black paint dry and then sponged red over it.  I used a primary magenta and quinacridone burnt orange paints thinned with fluid matte medium.  I wanted it to be kind of a wash over the black stencil, so I mixed it pretty thin.


After it dried (this is my kitchen table and DH didn't want any paint on it), I flipped it over and taped it down again -- it's still trying to curl.  I got out the gold and stenciled some cranes on the mulberry fiber side.

After it dried, I cut the mul-tex in half and layered each side with black batting and stitched all over.  I used red thread on one piece and black on the other.


I made it an odd shape because I thought it would look better that way.  I prefer the side that was stitched with the black thread.


And I lined it with a piece of red hand-dye.  I know the zipper is a little strange, but I didn't have a red one handy.