Friday, July 19, 2013

No Strings Attached Shibori - Part 1


Usually when I do shibori, I wrap the soda-soaked fabric around the PVC pole, wrap string around it, sometimes a rubber band at each end, scrunch it down, dip in or drizzle over with dye, batch, remove rubber bands, untie string, unwind string, unwrap fabric, rinse, wash, iron, and enjoy.  Phew.  I'm tired just writing about it.


But there has to be an easier way.  Right?  Since most of the work is in the prep, what if a couple of the steps were eliminated?  Like the string.  It's a hassle.  And, I've discovered, not really necessary.


I took my soda-soaked fabric, wrapped it around the pole, secured one end with a rubber band (I recycle the ones I get on broccoli and asparagus), scrunched, then secured the other end with another rubber band.

Then I rolled it in dye.  I mixed my dyes a little less strong than usual because I wanted to over-dye with a second round.


 I used two different black dyes to get this one -- love it just the way it is.

But this one which was wrapped around the pole with the widest diameter was not that interesting.

A perfect candidate for over-dyeing.  Along with the other two pieces I did.

Next:  the over-dye results.

I'm linking up with Nina Marie at Off the Wall Fridays.

Friday, July 12, 2013

Fueling the Magpie


I have this sparkly necklace that I really like.  But I haven't any earrings that I really like with it.

"You'll want something simple," the lady at the store said.  "So as not to compete with the necklace," she continued.

And the polite person my mother raised smiled and nodded and said nothing.

While the magpie inside shrieked, "ARE YOU KIDDING ME?!!!"


So I dug my jewelry-making tools out of the mothballs, along with some sparkly stuff from my stash, and created these beauties to vie with the necklace.


Since I had all that stuff out, it was determined that I may as well make more than one pair.

These are for DD -- they include: the sun and the moon, which shine upon her; a star, which she is; and a heart because she has mine.  And a couple of crystals to satisfy the magpie.


And a pair for me -- in my favorite colors (some of them, anyway.)

OK -- back to fiber.  I have some things that are nearly finished -- I'll get photos up here soon!

I'm linking up with Nina Marie at Off the Wall Fridays.

Friday, July 5, 2013

First Day Out With My New Foot


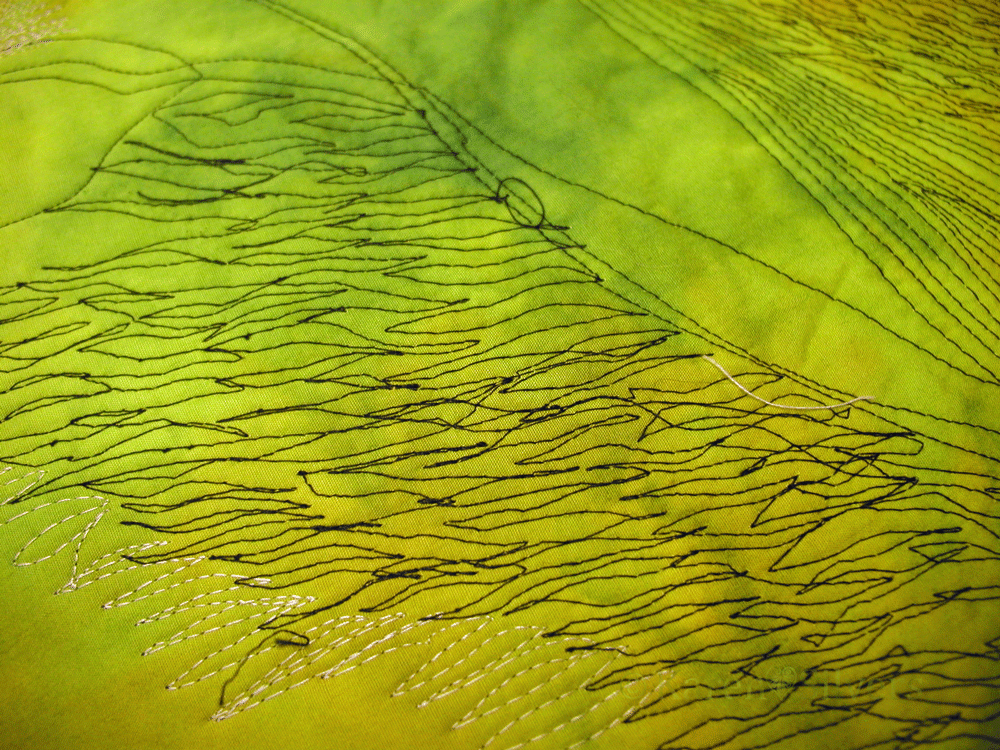
I have mostly finished the thread work on the tulips and Rosie.  I decided that some more traditional quilting in the background would be a nice change from all the intense threadwork on the rest of this quilt.

For quilting and thread-painting, I have been using the same foot I purchased with my sewing machine some ten years ago -- I can't believe it's been that long.  It's a clear circle and has worked pretty well up 'til now.  But I wanted to do some really tight quilting around these lovely feathers and I just couldn't see through the plastic well enough to do it.  


So I finally broke down and got an open darning foot.  Fortunately, I didn't just start right in on my Tulips and Rose quilt because it works very differently from my old foot.  I made up a sample with the same fabric and wool batting.  I used the blue washaway marker and drew some feathers.  


It took a bit of practice, but I have gotten the hang of it.  It's interesting (to me, anyway) that my freemotion feathers are better than the ones I did stitching along the lines I drew.

I'm linking up with FMQ Friday today.

Friday, June 28, 2013

One Stitch Forward, Two Stitches Back


So I was merrily stitching along on Tulips and Rose and I realized that I had done a terrible thing.

I finished a large section of Rosie's fur with the same stitching that I used for the tulips.

Aaarrrrrrgggggghhhhh!  It was particularly noticeable when compared with the correct Rosie's fur stitching.  I did take a moment and think, "well.... I could just leave it.  No one but me will know what it was supposed to look like."  But I couldn't.

Even DH, who entered my lair as I was grousing and mumbling profanities, agreed.  "You can't leave it," he said.   "It will bother you forever," he added helpfully .  AAARRRGGGHH!!

Of course, black thread on black fabric is a teensy bit difficult to see.  And as anyone who has ever ripped out quilting stitches knows, thin thread is especially awful to remove.


So that evening, was I comfortably ensconced on the couch watching TV?  Sitting on my can reading my book?  Happily doing anything?  No!  I was bent over the ironing board with a seam ripper, tiny scissors, and a pair of tweezers picking out stitches.  I discovered that the ironing board was a pretty good place to do this because, first of all, the light is good in my studio.  Second, it provides a firm surface and I could flip the quilt back and forth to snip and rip.  And third, it provides something against which to lean my tired self.


I'm pretty sure I heard the studio gecko snickering...


I used the dog hair remover roller thingy to gather up all the loose thread (sadly, it was not useful for threads that were not already loose).


 I estimate that I probably spent twice as long reverse stitching as I did stitching it twice.  Was it worth it?  Absolutely.


Yeah, I know that it's hard to see the difference.  But guess how much fun it was to try to remove all those threads.


So now I'm a little stuck on the eyes.  I'm not sure how to do the thread.  Usually, when I paint them, I don't use any thread on them.  But I'm thinking that the appliqué needs some thread to anchor it.  Does anyone have any suggestions?

I'm linking up today with Nina Marie at Off the Wall Fridays.

Wednesday, June 26, 2013

Ah, Summer


Since I often post photos of blizzards, I think I should give equal time to my favorite time of year.


I took these photos in my friend Jill's garden.  


Depending on which report one reads, we have received between five and ten inches of rain in the past few days.  Good for the flowers, but I have to keep emptying the water that collects in the dishes under the pots in my own "porch garden."  I'll post some photos of those plants soon.

Yes, that is an old sewing machine.  No, my friend doesn't sew very often.

Friday, June 14, 2013

Tulips and Rosie - the Beginning


Usually the bunnies nibble the stems of the tulips.   Then the buds fall off and I never get to see them bloom.  For some reason, this year the *%$&! rabbits left my flowers alone and I took a series of photos with Rosie posing with the posies.

I need a piece with a botanical theme and I really like this shot.

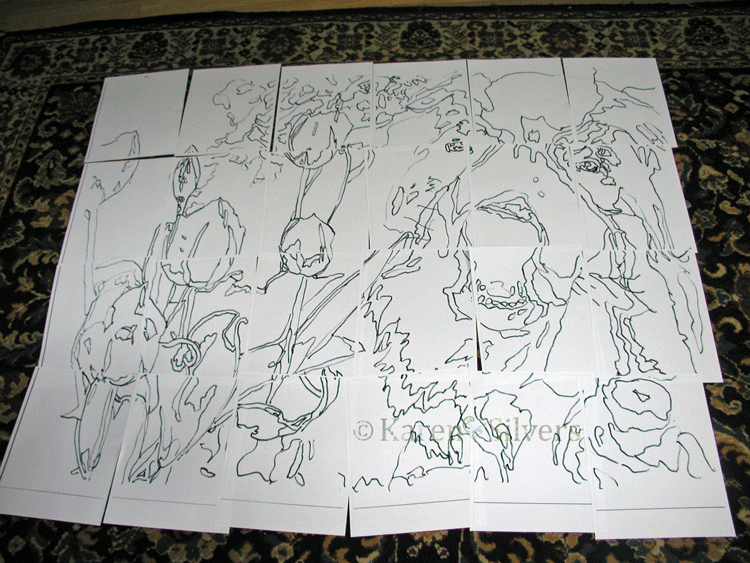
I wanted to work big this time, so I cropped it, converted it, made a line drawing, and printed out this pattern on my computer.  I laid it out on the rug and taped the sheets together.

note to self: next time vacuum up the dog hair before laying out the papers!


I traced it onto freezer paper and began cutting out the fabrics.  I'm using raw-edge appliqué for this with MistyFuse for my glue.

Getting the eyes done really makes a difference.


I made the tulips using Tsukineko inks on plain white fabric.  Then I fused them.  The pieces were just too small to fiddle with and I plan to cover them with thread anyway.

I'm linking up with Nina Marie at Off the Wall Fridays today.

Sunday, June 9, 2013

Evolution of a Horse


In the last post, I discussed how I got the horse on the fabric.  I was playing around sketching with a brush and some watercolors and came up with this image.  I decided to use it for my Asia-themed quilt for Art Quilts Around the World.  


I transferred the horse to fabric with a blue washout pen, pieced the quilt together, then layered it with wool batt, Decor-bond, and Kona black cotton on the back.  I ironed the whole thing to make it flat.  I quilted the parts around the horse fabric with 50 wt Aurifil with a lot of stitching in the ditch.


I machine-sketched with the heavy 28 wt cotton Aurifil thread (the one with the grey plastic in the photo above) and a 90/14 quilting needle.  I used the washout marker so I wouldn't have to follow the lines exactly.


Then I got out my Tsukineko inks and those silly little pointy applicators and inked in my horse.  I hit it with the iron again to set the inks.


After the ink was set, I used matching black/brown variegated 50 wt Aurifil to do the mane and tail.  Then I quilted the background around densely with a pale color of 50 wt Aurifil -- yes, there's a thread theme going on here...

After I finished all the thread work and bound it, I rinsed it in the sink to get rid of the blue washout pen.

For a closer look, click on the photos.