Thursday, April 12, 2012

A Good Day to Dye

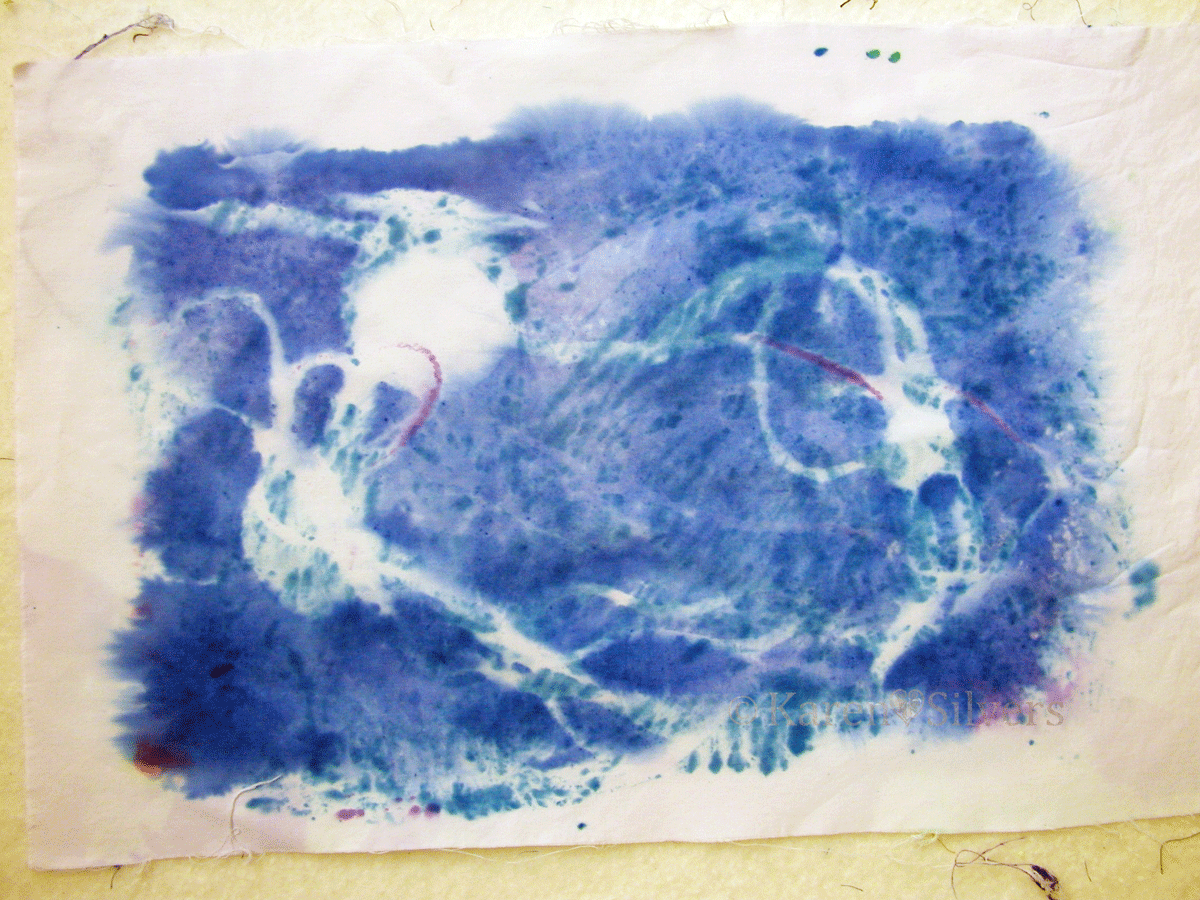
As promised, here are some results from my deconstructed screen printing.  I have only two screens (but I'll have more soon!), so this is the result of several days of dyeing.


 Thanks to the magic of photoshop, this has more contrast in the photo than the actual fabric.

 This is one of the first ones that I really like.  I discovered that using slightly thinner dye paste to make the print allowed more of the dye to dissolve onto the fabric.


 This one is pretty meh -- it has a bit more contrast in real life than here, but it's kind of nice texturally.

The background on this looks blue on my monitor, but it's not.  It's really white.  I love the dots.  

And this one looks kinda pinkish.  But it's not.  The colors on this are pretty soft.  I think I need to use more dye in the paste.

I really like this technique -- it's highly addictive.  If the weather would cooperate and warm up, I might get to do more.  I did do the last two inside, but I made a mess of the kitchen and cleaning it up and then cooking dinner wasn't a lot of fun.  So I think I'll try to do this outside (my neighbors probably love the craft table that is set up on the front porch...).  

Tuesday, April 10, 2012

Tuesday - Monday Design Wall

Yeah, I'm a bit late on this -- my design wall for today holds a bunch of unrelated projects:


I'll "splain these below, but first -- a report from my 2012 BOM group (more about that here) -- yes -- I was finally able to attend.  And I had this month's assignment finished!


 This block is called "Kakuyose" (Parquetry angles).    


Then we started arranging them -- it would make me crazy to make this many of a single block -- but it's a lot of fun to have them all to play with.

I usually do this in EQ7, but it's great to see them in "real time."


And the whole group on point.

This is "Kunojiki sujikai" or simplified right-angle braces.  I like the way some people used the background fabric -- the two on either side of the one in the top middle are really nice examples.


 "Tokiwa gaki" (Ordinary fence) Not so ordinary, if you ask me.  You might notice that the one on the top right has fence posts that hang off the bottom a bit -- that's what happens when you measure the center piece at 4 inches instead of 4.5 like the directions say (yep -- that's mine.)


These blocks are from the same book -- I did them in the spa blue and brown combinations because I want to use them to make a bag.  
And this is prepped for the appliqué block that goes on the front of the bag. 


This stuff on the left is also for a bag -- it's free-form pieced and I'm thinking of using it for my new spring bag.  I'm not crazy about it yet, so I'll have to do some more to see where it takes me.

To see more design walls, click here to go to Judy's blog.

And I haven't forgotten that I was going to post pictures of my latest screen print experiments.  The kids were off for spring break and I got busy.  Also, Mr. S finally made some new screen frames for me -- I haven't added the silk screen to them, but maybe by next weekend...

Monday, April 2, 2012

April Design Wall


My design wall for this lovely day in April sports this polka dotted wonder.  I spent last Friday with the friendly ladies in Monroe, Wisconsin.  We worked on this pieced wonder.

It is from a pattern called "Strip Stacks" by G.E Designs, Iceland, at: http://gequiltdesigns.com/.

For more design walls, click here to go to Judy's blog.

Sunday, April 1, 2012

April: Fooling Around With MonoPrinting


This month, I am "up" at the "Fire" blog.  This is a reprint of my post from today:  I have always wanted to try monoprinting on gelatin.  But the surface seemed so small and, while I do like to use paints and acrylic inks, I really wanted to try it with thickened dyes.  So last month, in preparation for this month, I started playing around with various thicknesses of thickeners to see what would work best for me.  I'm still playing (and I intend to play around with paints later this month), but these are my findings so far.


First, I needed a gelatin surface.  I rejected pie plates as too small and the sheet pan I wanted to buy from my local restaurant supply as too large (with the early spring, my "drive-in cooler" is way too warm to chill the gelatin) and settled on an old glass 8.5" by 13" dish.  This dish can no longer be used for brownies now that it has found its way into the dye studio, but I really don't need those calories (and in a pinch, I can always purchase ready-made brownies).
I did a little research and discovered that one tablespoon of powdered gelatin to one cup of water is about right for optimum wiggle vs. solid.  I filled the glass dish with water to determine the amount needed (8 cups) and poured a little less than half that of cold water into my studio mixing bowl (again, we don't want to mix up the studio stuff with the kitchen stuff).  I sprinkled in the 8 tablespoons of gelatin.  I mixed it with a whisk and let it soften while I boiled additional water.  I then added the boiling water to the 8 cup line and stirred it with the whisk.  While the gelatin cooled a bit, I sprayed the glass dish with Pam so that the gelatin would pop out easily.

 I poured the gelatin into the glass dish, covered it with plastic wrap and let it refrigerate overnight.  I didn't try to skim the bubbles or anything because I planned to use the other side for my prints.


The next morning it was set and and I inverted the dish on top of the plastic wrap so I could use the wrap to put it back into the dish when I was finished for the day.  I did find that sometimes I had to help it out of the dish with a plastic fork, but generally it popped out easily -- especially after it had been used once or twice.  When it started coming out of the dish in pieces, I just pushed them together and used it anyway, but replaced it soon after that. 

Blobby dyes -- okay, but not what I was looking for
I tried various degrees of thickened dyes -- I have a lot of really thick dye thickener from last month's experiments -- but found that when I added liquid dye concentrate it was globby and made my prints blobby.  I kind of liked the effect, but I really wanted to use smooth dyes.  I found that mixing the thickener as for dye painting and then mixing the dye powder directly with the thickener worked best.

The measurements that I used were as follows: for one quart water, two teaspoons of thickener.  Then add to that mixture one tablespoon dye powder for each cup of thickener.


I don't have a blender that I can donate to my studio right now (it's still needed for those pestos and certain summer drinks) so I found that if I sprinkle the thickener powder into the water while whisking, I can get a mostly lump-free liquid.  Let it hang out in the fridge overnight and it's perfect.  Just stir it up before measuring it out for the dye -- I use my trusty dye studio whisk.


After it's been used a bit, the gelatin takes on some nice color, but if it is wiped off, the color doesn't seem to transfer to subsequent prints.


I put the thickened dye in a plastic tray (I use these a lot for paint palettes) and spread it on the gelatin with the hard rubber brayer.  It seemed to work the best, the spongy one absorbed the dye and didn't lay the dye down on the gelatin.


I arranged some "stuff" on top of the thickened dye to act as a resist.  I discovered that flatter is better for "stuff" because I like crisp edges.  The plastic lid stuck up too high and I used a cutout circle of thin cardboard for later prints.


I laid a soda-soaked piece of fabric over and used the spongy brayer to smooth it down.  I need to get another hard rubber one because the spongy one absorbed dye and left it in places where I didn't really want it, although it worked well to smooth the fabric over the less-flat "stuff."   I soak my fabric in soda ash solution and spin the excess liquid out in my washer -- I did use some pieces that were still damp and it didn't seem to matter much.


After peeling the print off, I removed the resist "stuff," put down another piece of fabric and got some lovely negative prints.   I laid the prints in a single layer on thin plastic garbage bags that I had cut open; then I folded them up and let them batch overnight.


Some of the negative prints were less interesting and I put them on a pile to "overprint" later.  Below are more "finished" prints.


This last one is my favorite.  The strings were pretty saturated with dye and left lovely "ghost" marks on this one.  Also, I moved the fabric around on the gelatin so that the dye covered the edges.

I plan to do more with this -- I'd like to experiment with warm colors.  Also, I want to play around with acrylic paints and inks.  But I'm really liking it so far...

Later this week, I'll post some photos of the deconstructed screen printing experiments.

Sunday, March 4, 2012

A Bad Day to Dye...

 I have always wanted to play with screen printing and thickened dyes.  But I didn't have any screens.

But this month, on the ...Fire blog, Beth posted a wonderful tutorial on deconstructed screen printing.  And one of the rules is that we have to try each month's technique.  So I put my DH to work making frames for my screens.

Of course, he wanted to be fancy and make them with hinges (?!) and stuff, but I told him that I wanted them now.  Not later.  So skip the fancy stuff.
 And he complied.  He made two very nice frames and I attached the screen mesh and taped them up.  We had time to make only two, but next weekend, we'll have to make some more.


 I wrapped my portable ironing board in plastic (BTW, Beth's wonderful tutorial is here) and put down a catch cloth, then arranged a bunch of "stuff" on top.  I placed the screen on top of the "stuff" and added the thickened dyes.
 This is a photo of the second screen.  Gorgeous, no?  For some reason I didn't get a pic of the first one.  It was gorgeous as well.  I let them dry overnight (no, I didn't really sleep much... but I had some snow dyes going as well).
 This morning, I got up and got my stuff out of the fridge so it could come up to room temp.  I ran some errands, then got ready to print!

And made a mess.  The snow dyes were so awful, I can't bear to show them (one is happily sitting in a bath of blue dye as I type.  I'm not sure what to do with the other).  My lovely dyed silk screens turned to mud on the fabric.  Bleah!  This is the print from the first screen.

 So I got out some of the rubber bands that I save from the asparagus for shibori-dyeing and put them on the drop cloth, placed the screen on top and put on some more thickened dye.  I set both screens in front of a fan and took my coffee into another room to sulk.

After the screens were dry, I got out the print paste and thinned some with hot water.

I put the fabric on the soft surface and tried again.

And it worked!   I got lovely prints from my new screens!


Apparently my paste was too thick and couldn't push the dye through onto the fabric!  I am happy-dancing all over the place.  They're not perfect and I have to wait for them to batch to see what they're going to finish as, but they're much better.  So I supposed I won't be sleeping much tonight either.  And if I seem a little distracted at work tomorrow....well...

Monday, February 27, 2012

Discharge and Design Wall

I've been playing around with discharging fabric with bleach and deColourant.  Above are three pieces I pleated with my smocking pleater, then I dipped the top two in bleach and used deColourant on the third.  I really like that the third piece discharged to white.  


These next two are from a failed attempt at "snow-discharging."  I thought they looked pretty blah, so I mixed up some flour and water, spread it over, let it dry, then sprayed them with bleach.  Much better.


And this is my design wall.  That's Poseidon with his trident.  I ran out of MistyFuse and my LQS doesn't carry it anymore, so I had to stop for now.  Hopefully, I can work on this some more next weekend.  I'm having a little trouble deciding on the fabric to use for his seahorses anyway.

To check out other design walls, go to Judy's blog.  

Friday, February 24, 2012

Finally in February


Finally, we got a real snow storm.  The kind where the snow is wet and heavy and sticks to the branches.


The kind of snow that packs and makes really good snowballs.


And finally, I'm putting up a post.  I made this jacket for my daughter for her birthday.  Oh yeah, I planned it to match her boots.  


And there's a wee bit of action on my cutting table....